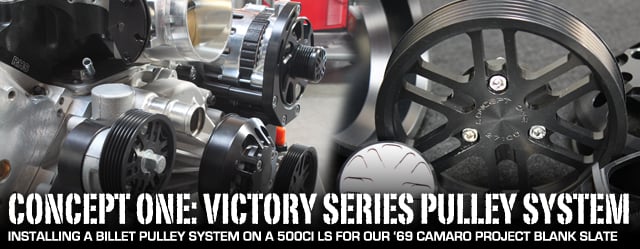
 [1]
[1]
Most people who have custom cars with an updated power train spend a lot of time getting all the details just right. This includes custom wiring, valve covers, headers, painted engines, and the list goes on. But after you’ve done all the detail work and made your engine compartment look just as great as the outside of the car, there’s one area that always seems to take all the punch out of a highly detailed engine: the pulleys and brackets. Those old V-belts riding on stock pulleys just don’t do justice for a detailed engine anymore.
 [2]
[2]Concept One anodizes their parts, and this allows you to always bring back the luster without having to refinish the components.
One solution is to add a pulley system to replace the stock pulleys and brackets. Concept One High-Performance Pulley Systems [3] makes a pulley set for many Chevrolet and Ford engines to make the front of your engine look just as custom as the rest of your car. These pulley systems are proudly made here in the USA, and are available in a few different finishes to match or contrast your detailed engine: machined, polished, anodized black or anodized clear.
History
The Redd brothers, Kevin and Randy, founded Redd machining and manufacturing in 1996. After years of restoration work and getting tired of parts that didn’t fit properly, they began making pulley kits and in 2001 the first Concept One Pulley System was available. The pulley kits are available for many of the non-Modular Ford engines, including the FE, Windsor and Cleveland, as well as small-blocks and big-blocks. For Chevrolet, the kits are available for small-block, big-block and the LS series engines.
Features
The grooved belts in these kits help to dissipate heat faster than the thicker, conventional V-belt on many of these older engines. Because of this, the ribbed belts tend to last a little longer than V-belts and the multi-groove belts and pulleys also reduce belt slippage.
The pulley kits are not powder coated for a reason, and Concept One says that the friction from the belt sometimes causes chipping. The heat can also cause the coating to lose it’s luster, and that can’t be corrected without stripping the part and then powder coating it again. While their pulleys and brackets do need a little more maintenance, they can always be brought back to new condition.
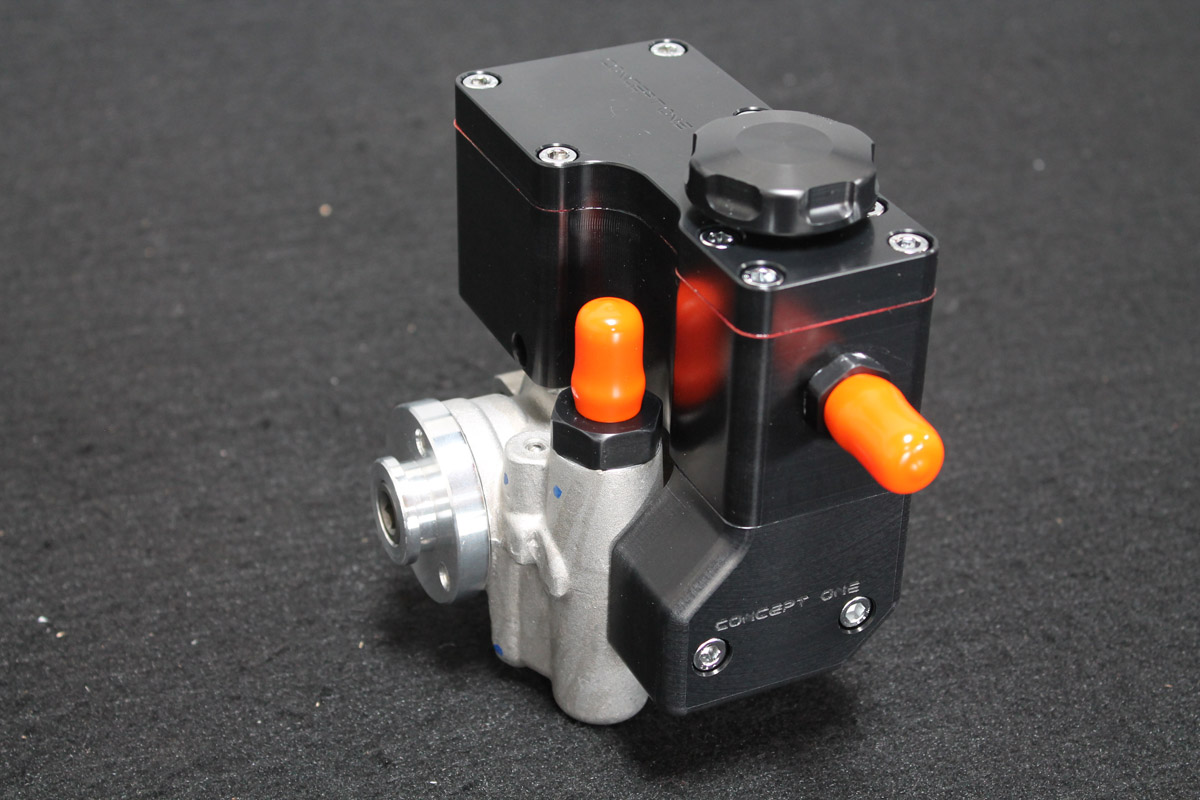
Part # LSV03AB
- New Delphi aluminum power steering pump
- Power steering reservoir – Exclusive Concept ONE billet aluminum pump mounted mini reservoir
- Cast aluminum water pump
- 105 amp polished Powermaster one-wire alternator
- High performance SFI approved harmonic damper
- Crank pulley, water pump pulley, alternator pulley, and power steering pulley
- Complete bracket set for alternator and power steering
- Alternator fan
- Alternator pulley cover
- Goodyear Gatorback belt
- GM tensioner
- Chrome hardware
 [4]
[4]
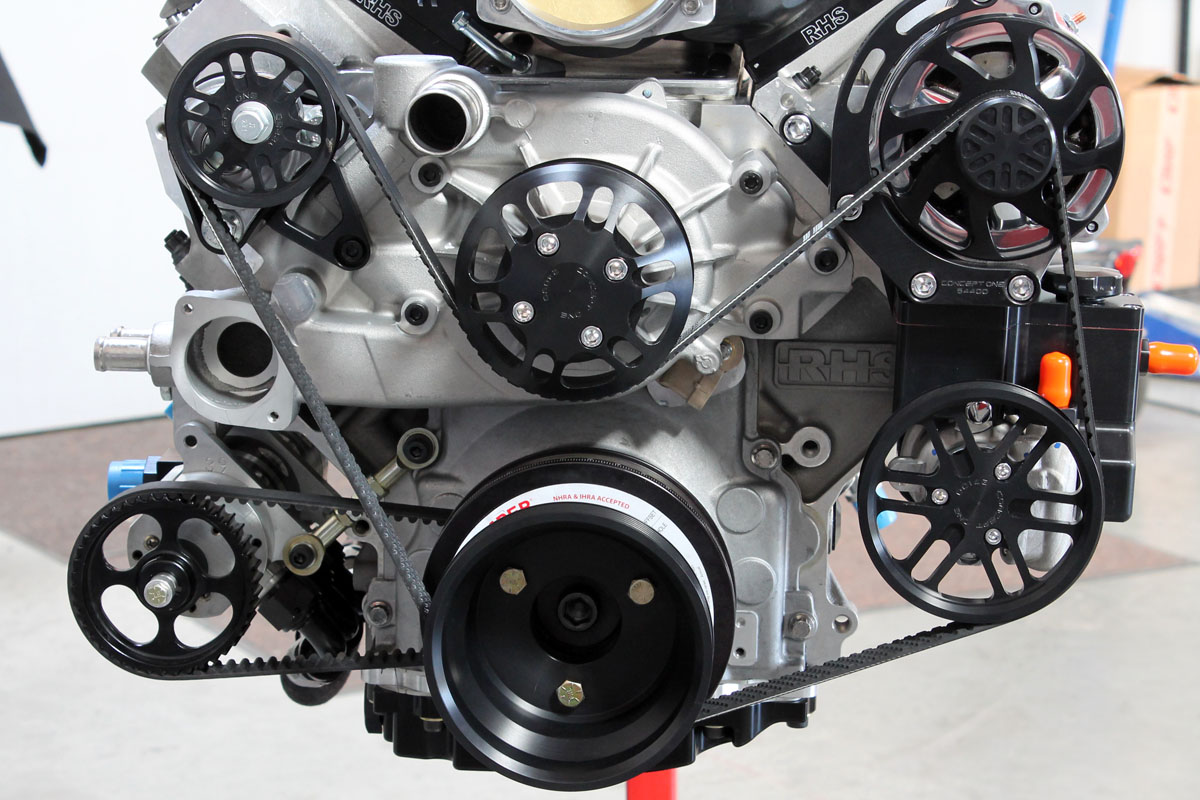
Victory Series
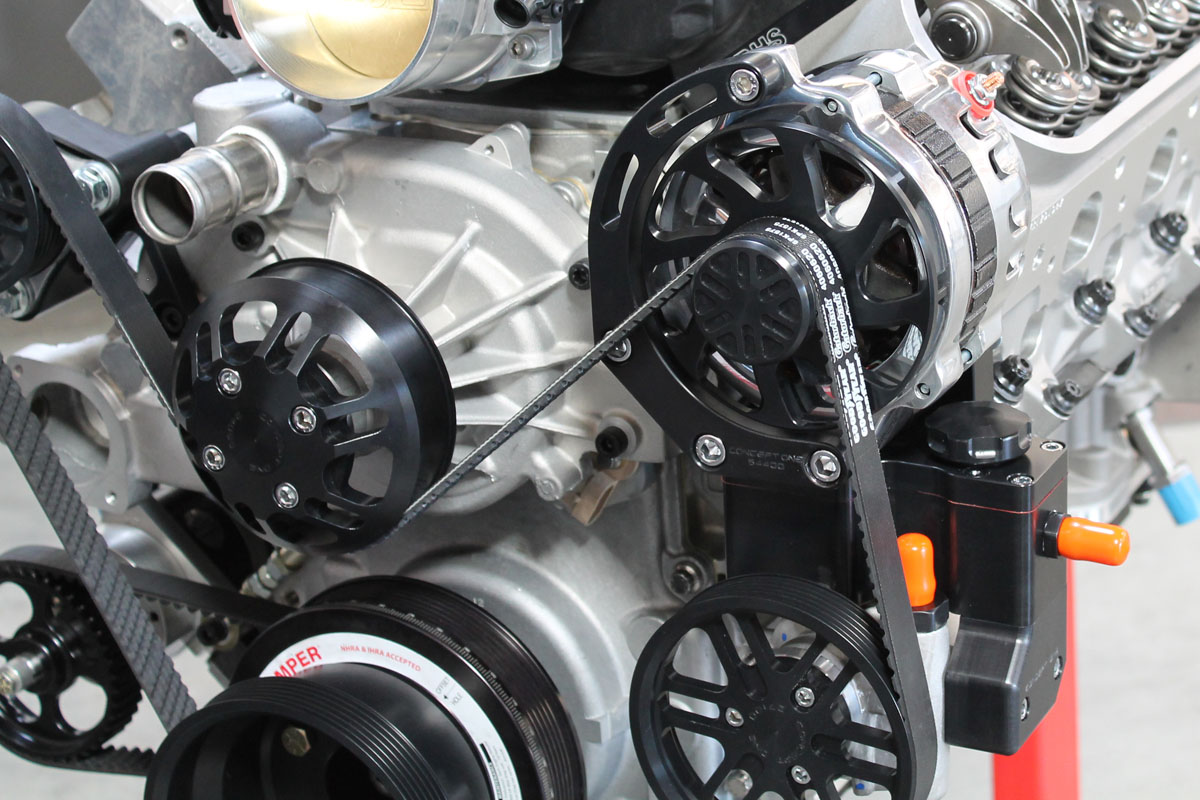
Our project car is a 1969 Camaro with a 500 cubic inch RHS motor [5], and the pulley kit that we got from Concept One is their Victory Series kit [6], which is a fairly new design from Concept One. We got kit number LSV03AB, which is for power steering, without A/C, and has black anodized pulleys and brackets.
The LS kit will work for any current LS motor, including the LS7. The LS7 will require a different crank pulley if you’re keeping the dry-sump oil system. The LS kit will also fit on older GM Gen III and Gen IV engines including the LQ9 and L92 GM crate engines, and also the VVT engines.
“The LS7’s crank pulley is shorter than most other LS engines because it has to power the dry sump oil pump,” said Concept One’s Kevin Redd. “If someone wanted to convert their LS7 to a wet sump, we can also set them up for that. When you remove the external oil pump, the crank pulley can slide down the snout of the crank further and ends up being in the same position as the other LS engines.”
If you buy a basic kit and later decide to add A/C or power steering, the only thing you need to do is buy the additional components, and not a complete new kit. Your existing parts will work, and you only need to add everything for the A/C compressor or power steering pump.
“The mounting brackets are made of T6-6061 aircraft grade aluminum, and the hard-coat black anodizing on our kit should never wear out,” said Redd.
Included in the kits are some components from well-known and trusted names. Fluidampr [7] provides the crankshaft damper, and the alternator is based off of the CS130 from GM with the small bolt pattern, and made by Powermaster [8].
 [9]
[9]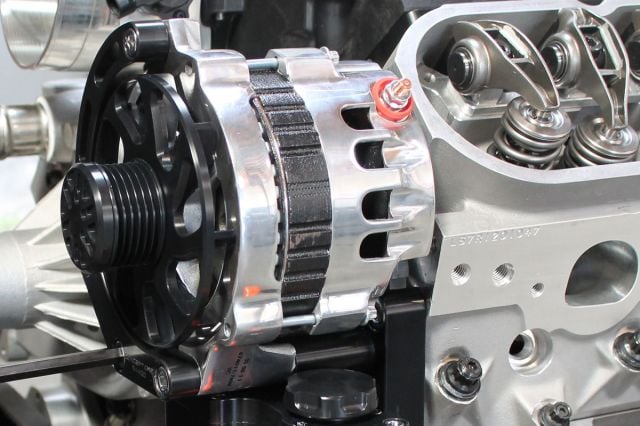 [10]
[10]
For typical applications the standard, 105 amp one-wire alternator should be sufficient. For those wanting more power for applications with high-power audio, dual cooling fans, etc., the guys at Concept One recommends upgrading to a 140 amp alternator.
The power steering pump is from a 97 and up Corvette, and Concept One modifies it for you based on your needs. For a stock steering box or rack and pinion, they can adjust the pressures to fit the flow rate that you need.
For applications with A/C, their compressor will work with factory parts that came with the car and also many of the aftermarket A/C parts out there. As an added benefit, this kit will convert your system over to R134 if it isn’t already.
These accessory drives are meant for engine swappers who are putting an LS in a muscle car. – Kevin Redd

Just like for this Camaro, the Concept One Pulley System is designed to fit in lots of applications where anyone might transplant an LS series engine. If you’ve ever had to find the accessory drives and piece them together to get your LS project going, you know how much of a pain it can be. This kit will take all the repeated trips to the yards out of the equation.
“These accessory drives are meant for engine swappers who are putting an LS in a muscle car,” Redd tells us. “It should fit just fine in 55-57 Chevys, Chevelles, and First-Gen Camaros.”
 [11]
[11] [12]
[12] [13]
[13]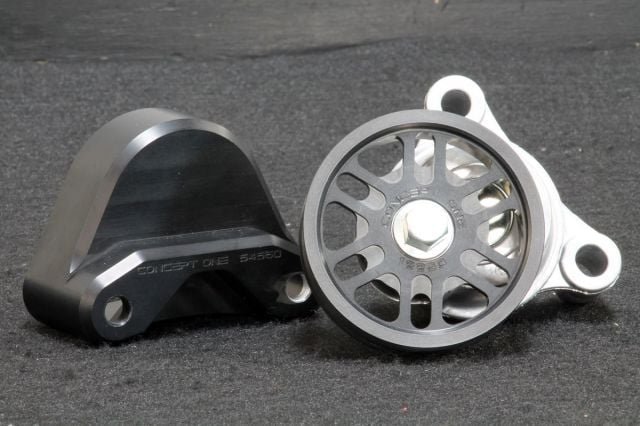 [14]
[14]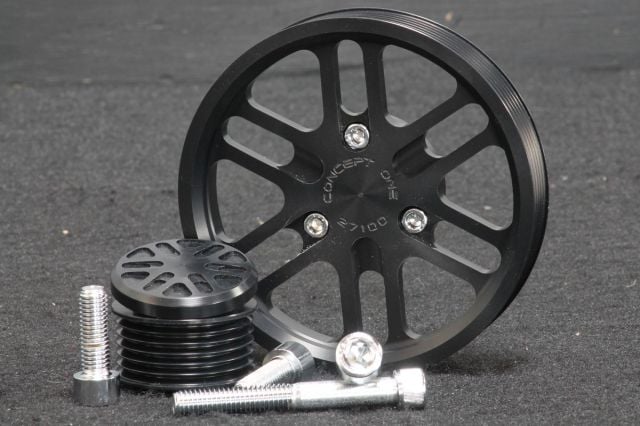 [15]
[15]
Damper Installation on an LS Series
Starting with an engine with all drive pulleys and accessories removed, the first part to install is the crankshaft damper. If you’re removing the stock damper, be sure to lock the flywheel so the crankshaft can’t rotate, and don’t discard the bolt because you will need it to initially install the new damper. You want to be sure that the crank snout is free from all burs and debris, and that you use anti-seize on the threads. Using a damper installation tool, install and seat the damper. Using the old crank bolt, tighten the damper to 240 ft-lbs and then remove the old bolt.
With the new crankshaft bolt, first tighten the damper to 37 ft-lbs on the first pass. Using a protractor with the axis vertical, make a mark at 0° and at 140°, approximately 5 o’clock. Starting at the top, use an long handle wrench and tighten the bolt, pulling the handle down to the 140° mark, and unlock the flywheel.
Kit Installation
The rest of the kit’s components should be installed in the same order as the instruction sheet, mounting the parts as shown in Concept One’s illustrations. As with any set of instructions, some parts cannot be installed out of sequence, so it’s important to take the installation one step at a time. The crankshaft pulley mounts with bolts supplied in the kit, and this pulley can be installed first.
The bottom left photo shows the steering pump spacer bracket that must be installed for proper pump alignment. [16]
[16]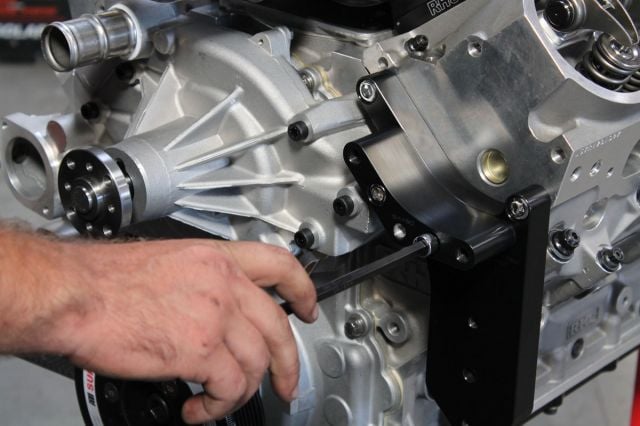 [17]
[17] [18]
[18] [19]
[19]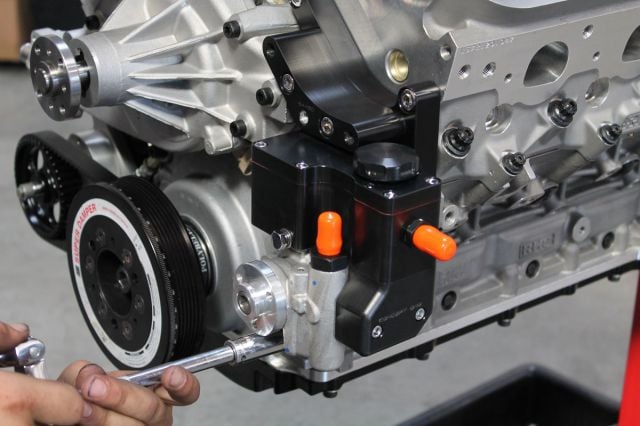 [20]
[20]
We have a dry sump oiling system on our RHS LS engine, so our engine already had the damper installed. We installed the supplied crankshaft pulley, and then started on the alternator/power steering pump bracket. There are three parts that need to be installed prior to the power steering pump being installed, and they must be installed in the order shown.
The main alternator/power steering pump bracket bolts to the driver’s side cylinder head with the three bolts provided. A spacer is then bolted to the bracket, and this allows the proper spacing for the pump. To mount the power steering pump to the bracket, you must use the spacer as shown in the picture above, being sure to run the pump mounting bolts through the pump and spacer, and into the main bracket. It’s best to install the power steering pump pulley after you mount the pump and reservoir so that you can easily access the mounting bolts. Once the pump is installed, install the pulley with the three bolts provided.
 [21]
[21] [22]
[22] [23]
[23]
With the alternator arm bracket installed, the three longer bolts are run through the bracket using two spacers to mount the alternator.
The alternator pulley and fan should be installed on the alternator before you mount the alternator to the bracket. The alternator arm bracket is mounted to the alternator with a single metric 8 x 25 socket head screw. Using the two bolt spacers, run the three long 3/8 x 3 inch socket head bolts through the arm bracket and the two spacers to mount the alternator to the alternator spacer bracket that was mounted prior to the pump installation.
Remove the center bolt from the passenger side of the water pump and set it aside; you’ll be reusing it to mount the tensioner support bracket. The two flange bolts will then mount the tensioner, cover and bracket to the water pump. With the water pump pulley installed using four 5/16 socket head screws, and the tensioner mounted, the last thing to put on is the belt.
 [24]
[24] [25]
[25]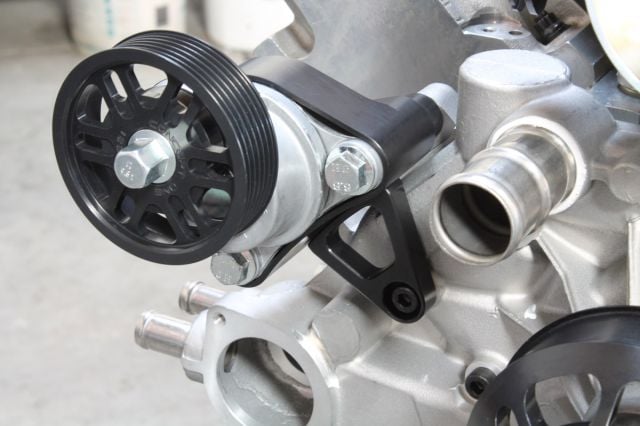 [26]
[26] [27]
[27]
Mounting the tensioner is the final step prior to installing the belt. Using a socket wrench to turn the tension, the belt can be slipped over the pulley. Then, slowly ease back on the wrench until there is tension on the belt.
Since the tensioner takes up all the slack in the belt, route the serpentine belt around all of the pulleys and using a socket or box end wrench on the center bolt, and slowly turn the bolt in the direction of the arrow on the housing to rotate tensioner enough to install the belt. The belt used in the kit is a standard belt that you can get at almost any auto parts store, so when it comes time to replace it you can rest assured that you won’t be searching for an odd length that nobody keeps in stock. Once tension is on the belt, take the time to recheck all mounting bolts to be sure that everything is snug and secure.
 [28]
[28]The '97-up power steering pump and Concept One's mini reservoir are a perfect match for the LS7.
Bleeding Steering Pump Reservoir
After installing the steering pump and all hoses, you have to bleed the trapped air our of the mini reservoir. Fill the reservoir to just above the tube with the proper power steering fluid. Raise the front end of the car and place it on jack stands. Support the vehicle properly, don’t rely on a floor jack to hold the car up. Then, slowly turn the steering wheel from lock to lock a couple times, or until you see that the fluid in the reservoir stops bubbling.
Next, check the fluid level and fill if needed. Then start the engine and turn the wheel to one side and hold there for a couple seconds, then to the other side and hold it there. Return the wheels to center and then shut the engine off and check the level, and again add fluid as needed. Continue to check for noise from the pump and repeat the process above until all noise disappears.
Redd suggests checking the reservoir again in the morning while the engine is still cold, starting the engine, and filling the reservoir to just below the threads if necessary. This procedure should have your reservoir filled properly.
Keep in mind that Concept One carries a complete line of Aeroquip [29] power steering hose kits with black abrasion or stainless steel braiding to dress up your engine compartment even further.
Conclusion
All in all, the install of the Concept One Victory Series Pulley System on our LS7 it’s a very straight forward installation and only a couple of hours. As with most installs like this, following the directions will made the whole process much smoother. Anyone with basic tools and abilities can install this kit on their engine, whether it’s on a stand or in the vehicle. It’s nice to know that the finish on all the parts in this system won’t come off even with normal use, and the pulleys and brackets can always be returned to the same slick look they have now. The Concept One Pulley System really cleaned up the front of our engine, giving it a custom look that will definitely turn heads when we pop the hood.
 [30]
[30]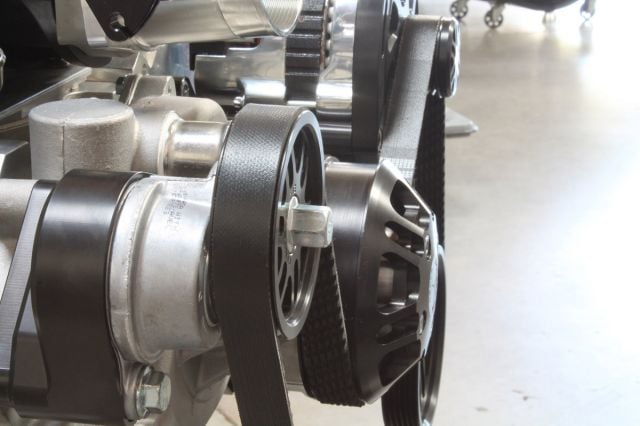 [31]
[31]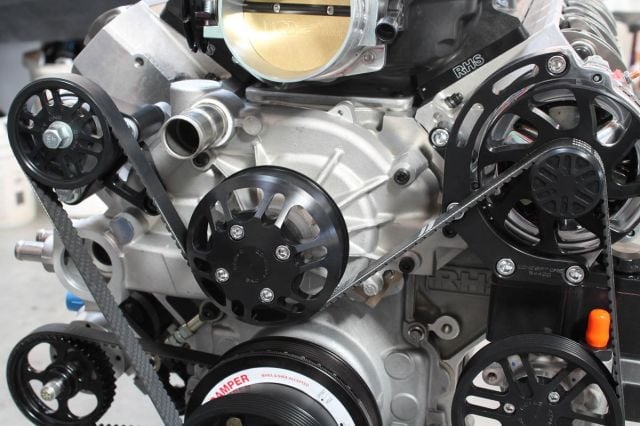 [32]
[32]