 [1]
[1]
As untold numbers of hot rodders have found out the hard way over the decades, producing additional power and reliably putting it to the ground is very much a package deal. In that, we mean you can’t simply pour all your hard-earned cash into the engine and ignore what’s connected to it. Well, not unless you enjoy fixing transmissions, tossing driveshafts, and dumping rear ends on the pavement, anyway.
Because we all want to go fast (after all that’s why you’re here reading this), aftermarket rear end housing upgrades are a common item on the enthusiast checklist. But say, unlike a drag racer who will piece together his own high-end, fabricated race housing, you’re looking for the simplicity of a complete aftermarket housing that will handle the rigors of your daily driving and some light dragstrip action without breaking your piggy bank?
 [2]
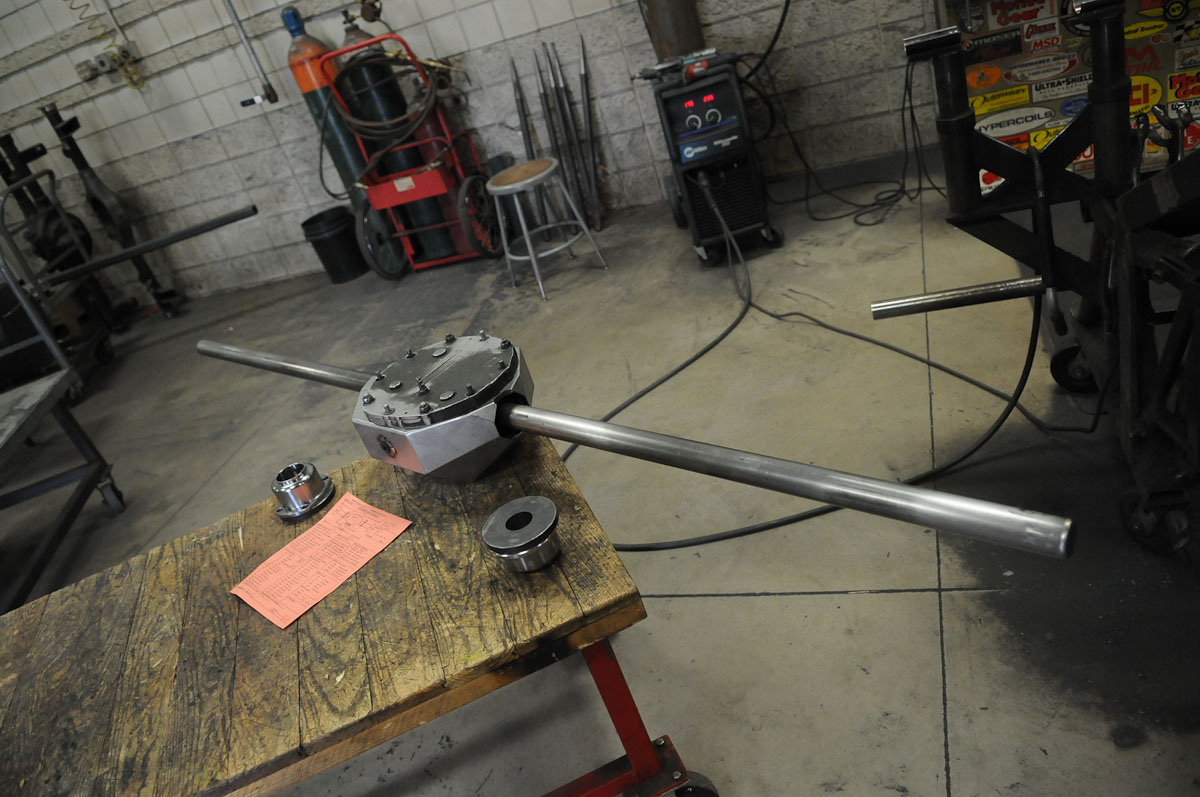
[2]This Moser 60 housing, which we'll be assembling in detail later in this article, is one of five ready-to-install Muscle Pak housings that Moser Engineering offers for a wide range of GM, Ford, and Chrysler street and strip vehicles.
Moser’s Muscle Pak rear ends take the hard work out of building a housing so that you can spend more time enjoying your ride and less time under it.

Listed below are just some of the features of the six different Muscle Pak rear-ends that Moser offers. Across the board, these housings come with OEM mounting provisions, axle bearings, stock wheel studs, retainer plates, a differential set up with Timken bearings, and 11-inch drum brakes with an E-brake. Every Muscle Pak housing is sent partially assembled for shipping purposes, but is a complete housing with only minimal grunt work involved. To learn more about each housing and the myriad of vehicles for which they mount as a direct bolt-in, visit moserengineering,.com.
Moser 9-Inch [5]
Based on the popular Ford 9-inch utilized by drag racers, features Moser’s new 9-inch Hot Rod housing, 31-spline bolt-in axles, axle bearings, Superlight nodular case, nodular Daytona pinion support, Track-Loc Posi, ring and pinion, 1310 series pinion yoke.
Moser M9 [6]
Featuring a fabricated housing like that of Moser’s higher-end drag racing rear-ends, the M9 package includes all of the same great features of the 9-Inch above, but with the strength and rigidity that a fabricated housing offers.
Moser 12-Bolt [7]
Moser’s 12-bolt Muscle Pak for a wide range of 1955 and later Chevrolet pickups and muscle cars sports 30-spline bolt-in axles, Moser’s new 12-bolt casting from the best nodular steel, 3-inch DOM seamless tubing, 1310 series yoke, and more.
Moser 60 [3]
Based on the original Dana 60 housing, the Moser 60 features 35-spline bolt-in axles, a 5 x 4-1/2 bolt pattern, 1350 series cast pinion yoke, chrome cover, and flat pinion snubber.
Moser 8.75
For A, B, and E-Body Mopars, the 8.75 Muscle Pak rear-end includes a new 8-3/4-inch stamped housing with 30-spline bolt-in axles, a nodular iron 489 case, and an Auburn Posi.
Moser MO 875 [8]
Also for the classic Mopar vehicles, the MO 875 features Moser’s new MO875 fabricated housing, 30-spline bolt-in axles, 5 x 4-1/2-inch bolt pattern, nodular iron 489 case, and an Auburn Posi.
When purchasing your Muscle Pak housing, Moser offers your choice of a range of gear ratios and several knurl, screw-in, or knurl/disc brake stud options (only two of which come at an extra cost). The optional upgrades, as previously mentioned, include such features as True-Trac Posi’s, a WAVETRAC (35-spline only), Detroit Lockers, Aluminum cases, upgraded Moser Economy or Performance Drag Brake Kits, a long list of Wilwood Dynalite and Dynapro rear brake kits, spools, and more. Many of these upgrades are dependent upon the particular housing and not available on every unit, so be sure to check out the Moser Engineering print or online catalog for a complete listing of options.
 [9]
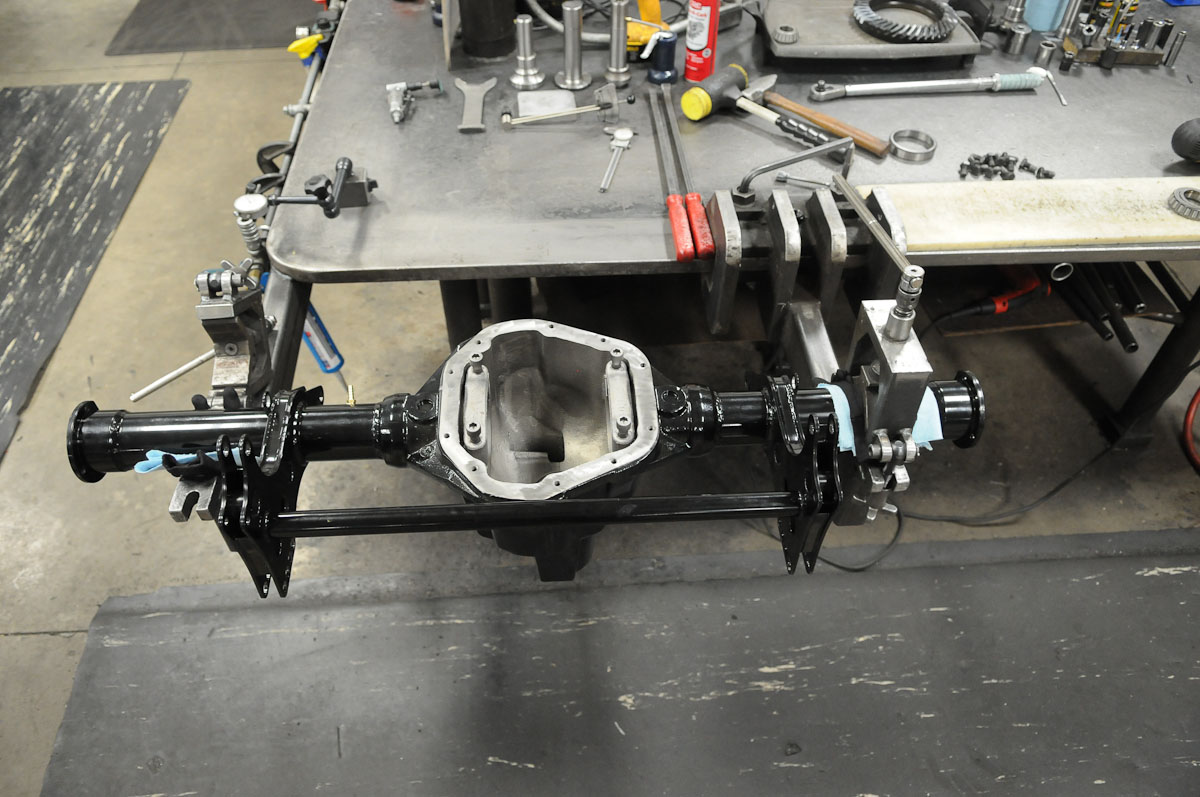
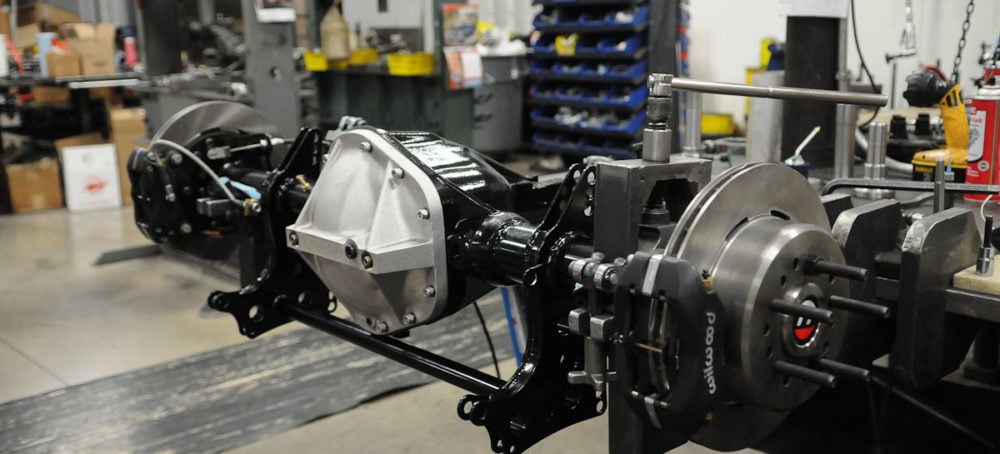
[9]The Moser 60 housing, with optional four-link brackets and cross brace and powder coated in black, ready for assembly.
Optioning Out Your Muscle Pak
As mentioned above, each Moser Muscle Pak housing comes with its own distinct list of options catered to the specific style of housing and the application for which you plan to install it. To view the product pages for each Muscle Pak housing, simply click over to the Complete/Asssembled Housing section on the Moser Engineering website, where you’ll find the Muscle Paks, along with various other product offerings from Moser.
 [10]
[10]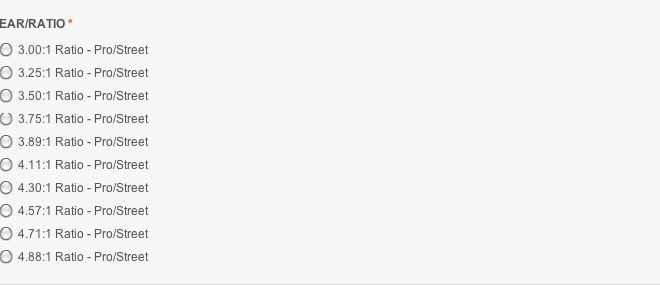 [11]
[11]
At left are the Miscellaneous Upgrades for your housing, including Nodular Iron and Aluminum cases, WAVETRAC's, Truetracs, and the like. On the right, you'll find the gear ratio options, which range from 3.00:1 to 4.88:1.
As our example spotlight, we’ll take a look at the 9-inch version. As you navigate to the product page [5], the first option you’ll come to is the shipping arrangement. Keep in mind, this is no small package being carried to the door by the UPS man; we’re talking freight here. From there, you’ll locate the year, make, and model of your vehicle, before moving on down to select your desired gear ratio and your stud type/measurements.
Then comes the fun part where you get to make your Muscle Pak your own with a number of different options. First are the Miscellaneous Upgrades, consisting of thins such as upgraded Nodular Iron Cases, Truetrac’s, Detroit Lockers, WAVETRAC’s, and spools. As we move down to the next section, we see brake upgrades, of which there are many. In essence, you have your choice between Moser’s own line of drag brake kits, and Wilwood’s Forged Dynalite, Dynapro Low-Profile, forged Dynalite Pro Series, and Dynalite Drag brake kits. There are 23 brake packages listed, and if by chance you already have a set of brakes, you can opt out on ordering them entirely.
 [12]
[12]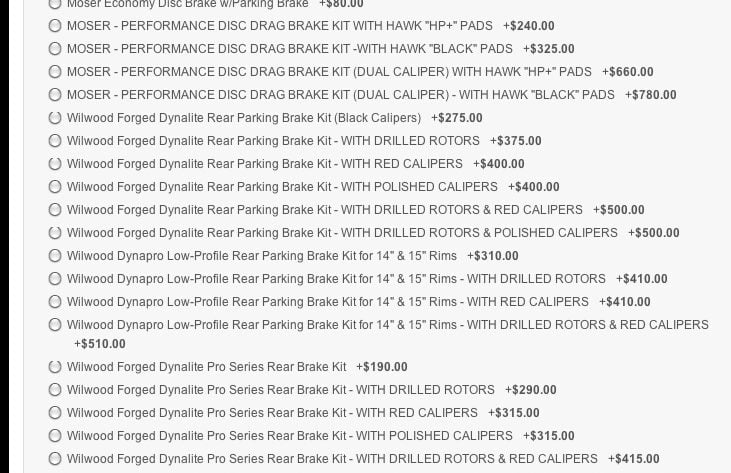 [13]
[13]
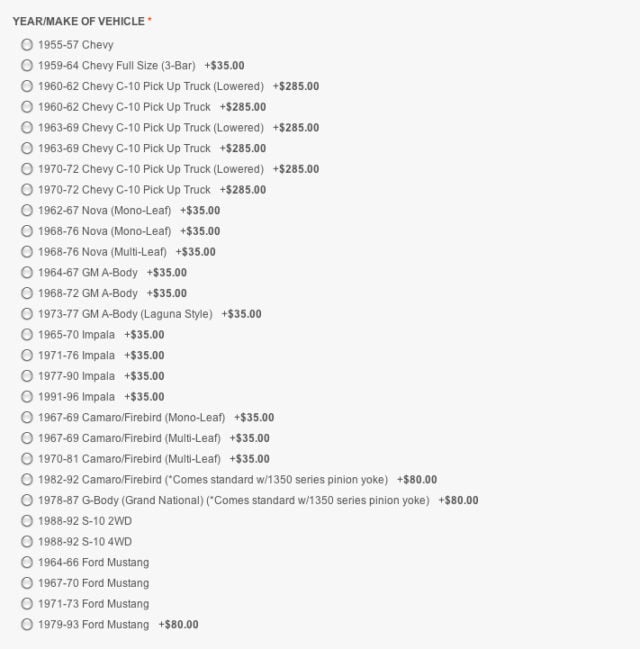
At left, you select the vehicle year, make, and model for which you'll be installing your nine-inch Muscle Pak housing. On right are the myriad of brake options from both Moser and Wilwood.
In the section that follows, space s provided for you to enter a custom width and pinion offset if you so desire to have the housing prepared to your specifications.
Finally, we come to the Powder Coating options, where the look of the underside of your vehicle takes shape. Moser offers 12 color options on the nine-inch Muscle Pak, including such colors as Flat Black, Semi-gloss Black, Flat Red, Gloss Red, Gloss Orange, and others. Or, like the brake kits, you can opt to save and paint the housing yourself.
Assembling a Moser 60 Muscle Pak
Today, with the help of the expert staff at Moser Engineering, we’re going to walk you through the complete assembly of one of their Moser 60 Muscle Pak’s, intended for A, B, and E-Body Mopar vehicles such as the Duster, Dart, Barracuda, Demon, Belvederes, Superbirds, Road Runners, and other classic Chrysler iron.
 [14]
[14]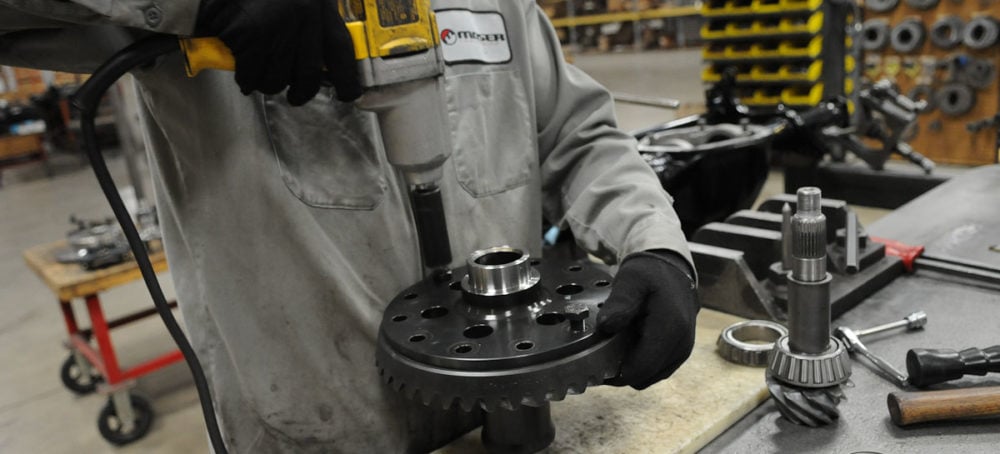 [15]
[15]
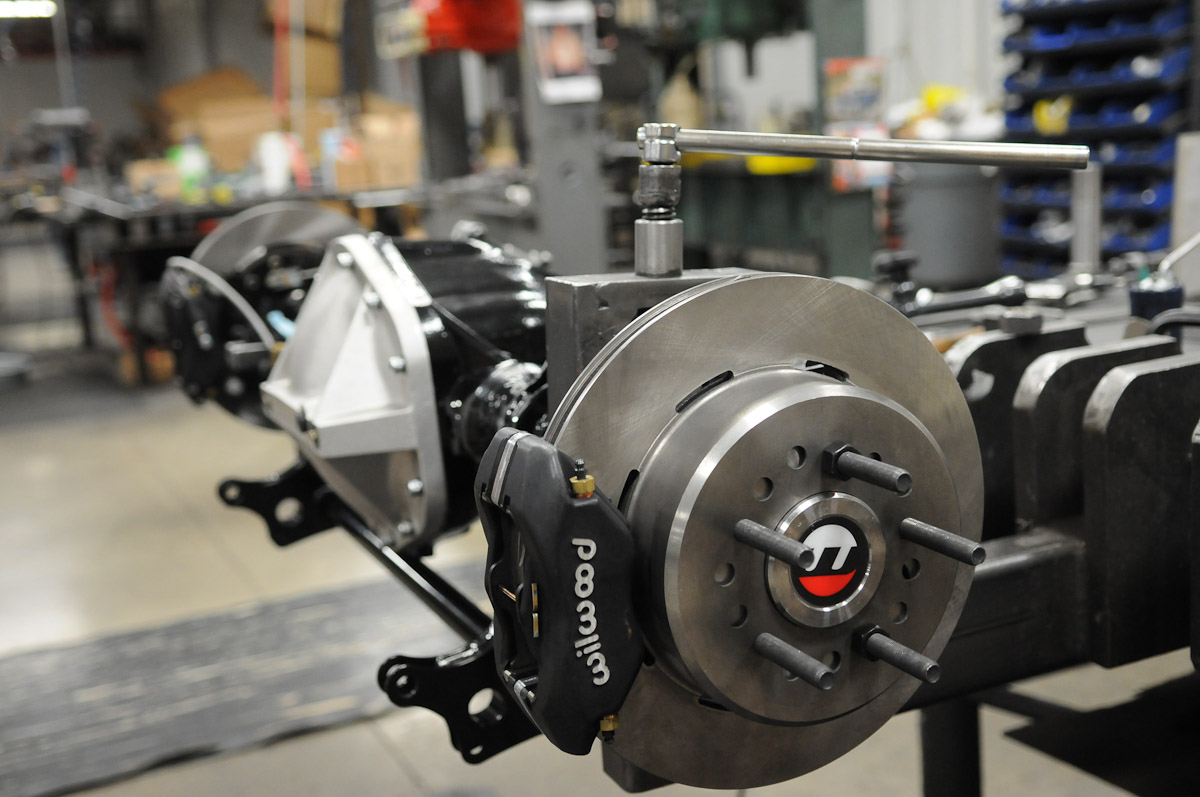
At left, the bearing is press-fit onto the pinion shaft. At right is assembly of the carrier, with the selected ring gear bolted to the spool.
Muscle Pak housings come standard with drum brakes and a Posi, but this particular buildup is set to utilize an optional spool and Wilwood brakes. It also features a welded and braced four-link bracket setup.
 [16]
[16]
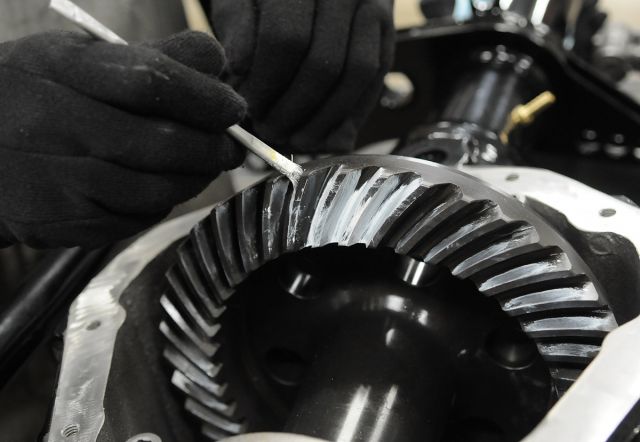
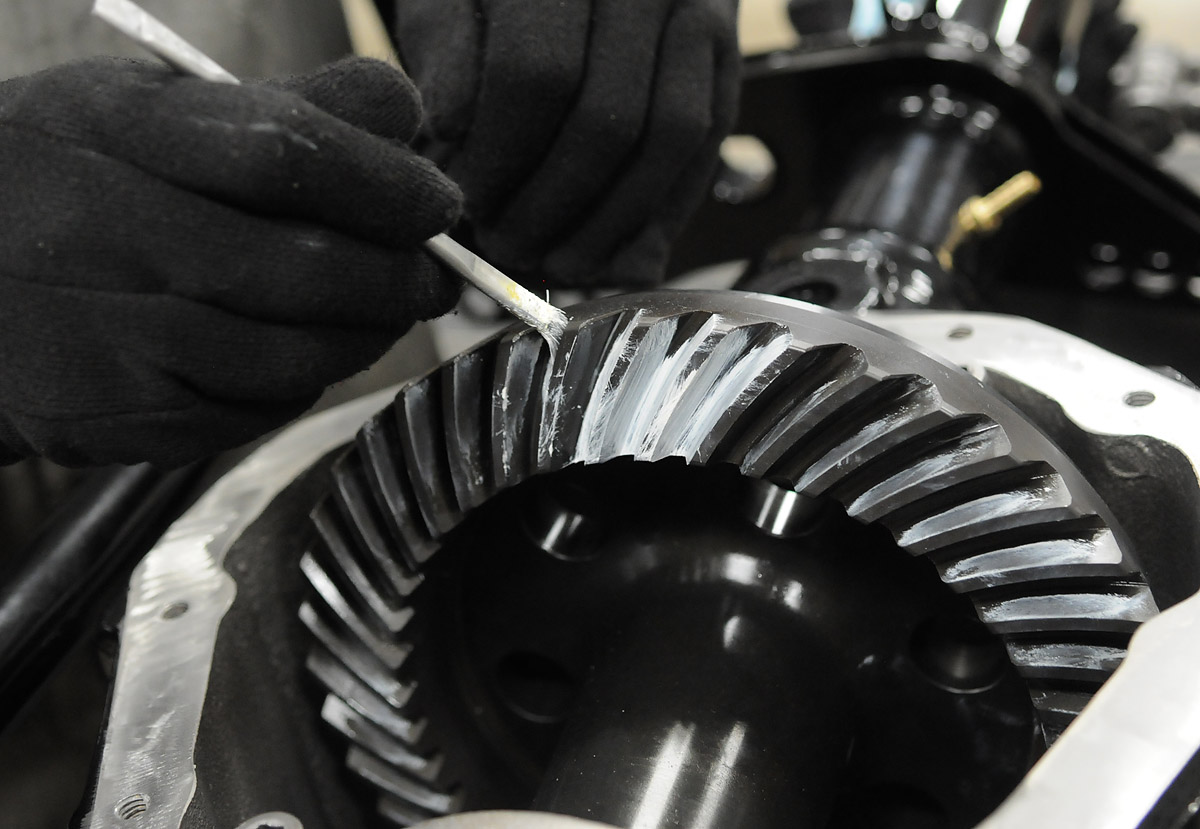
Backlash is the minute space that must exist between the contact areas of the ring gear and pinion. When the differential is spun, there’s a specific amount of space that it will turn before actually contacting the ring gear, and this is essential for a couple of reasons. Too little backlash will cause the pinion to jam into the ring gear and produce friction and heat that will lock the axles up. Too much backlash, however, will set the ring and pinion teeth too far apart and ultimately chip the edges of the teeth off under hard driving conditions.
Because the Moser 60 housing is assembled from the rear, our build process begins with the assembly of the pinion, which has the bearing pressed on and is then set down into the housing.
From there, we assemble the spool and ring gear, which are easily bolted together using an impact following the application of some Loctite. Simple to assemble, but not quite as quick and easy to set up properly.
Backlash is achieved using one or more thin shims that are placed on one end of the spool to arrive at the proper offset in relation to the pinion. This creates some headache for anyone performing the assembly, as you must install the bearings, drop the spool into the housing, measure how far off you are, pull it out and remove the bearing, add or remove shims, rinse and repeat. In this particular case, the housing had already been assembled once and the desired 0.010″ to 0.020″ backlash determined, so we missed out on the fun part. Backlash is also achieved with shims on the pinion shaft that alters its depth in the housing.
 [17]
[17] [18]
[18] [19]
[19] [20]
[20]
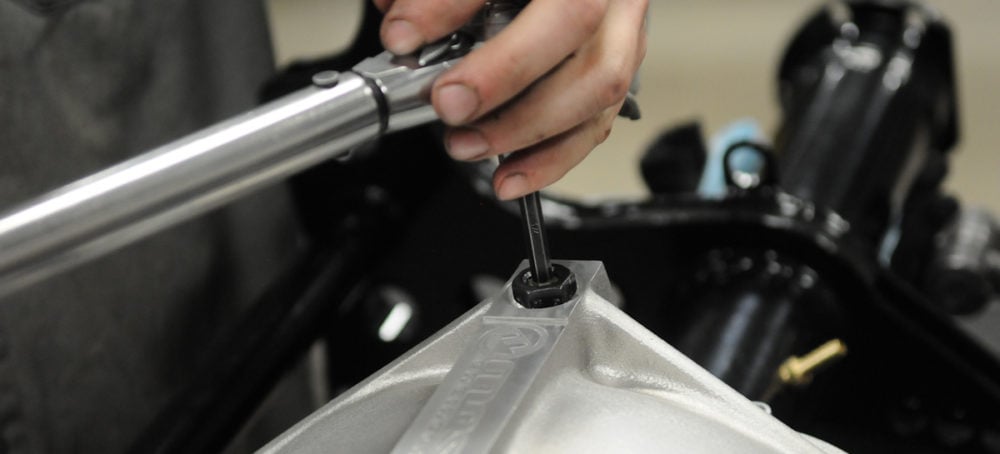
Thin shims are utilized on both the pinion and the carrier to obtain the optimum backlash measurement between the contact points of the two gears. Backlash can be checked using the shown torque tool once the pinion and ring gear are installed and the caps torqued to the appropriate setting to ensure the gears are in their final position.
 [21]
[21]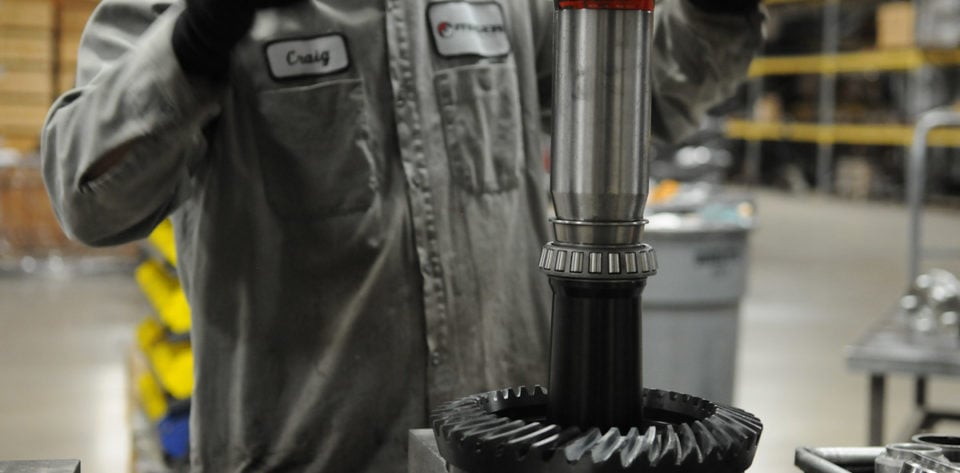 [22]
[22]
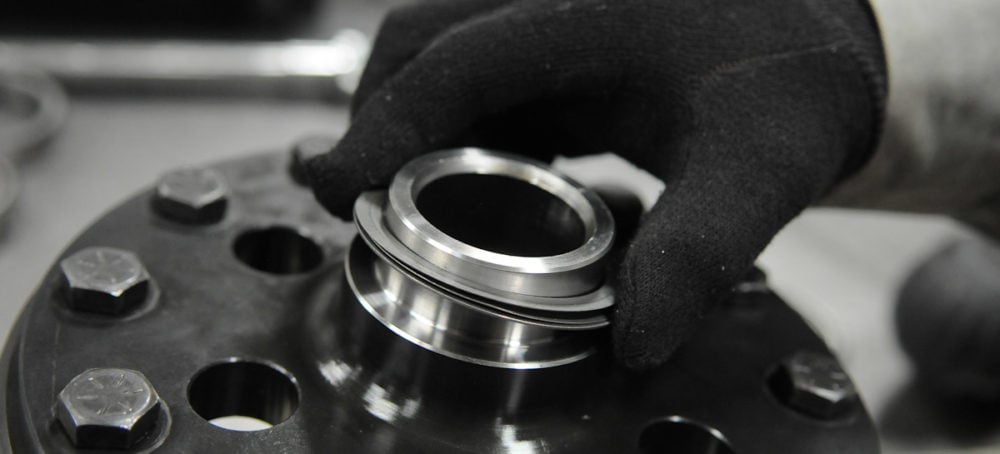
Fear not, however, as Moser utilizes “dummy” or “setup” bearings that slide on and off rather than being pressed on for determining backlash so that the bearings you receive are fresh and only press-fit once. For final bearing assembly, the bearings are heated up so they slide right on and then are pressed. In the Moser 60 and 12-bolt housings, the shims are on the outside of the bearing races, eliminating some of these steps.
 [23]
[23] [24]
[24]
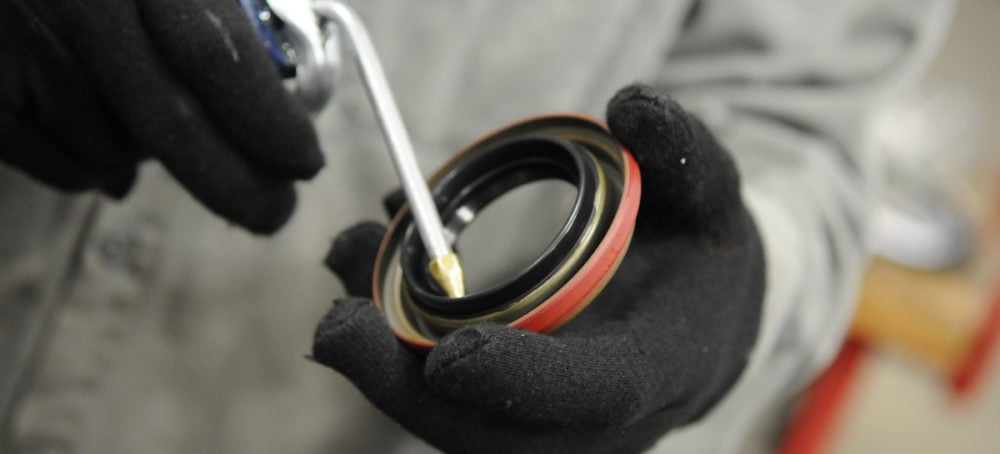
Once our backlash is set on the pinion and carrier, we're ready for final assembly. This begins with the installation of the pinion seal, which is tapped into place before installation of the pinion.
 [25]
[25]Backlash set and the pinion in place, it's time to drop the carrier down into the housing and follow through with final assembly.
With the measuring out of the way and the bearings pressed, the pinion set in place, and the spool and ring gear set in the housing. The caps that hold the spool in place are torqued, the yoke installed and torqued, and we’re ready to move on to installing the rear cover.
Moser offers both street and performance covers dependent upon the horsepower range for these Moser 60 housings; the performance cover is what you see here. These covers feature pre-load bolts that are torqued from the outside to just seven in/lbs to essentially “back up” the carrier caps as the pinion tries to force the spool and ring gear out the back under load.
 [26]
[26]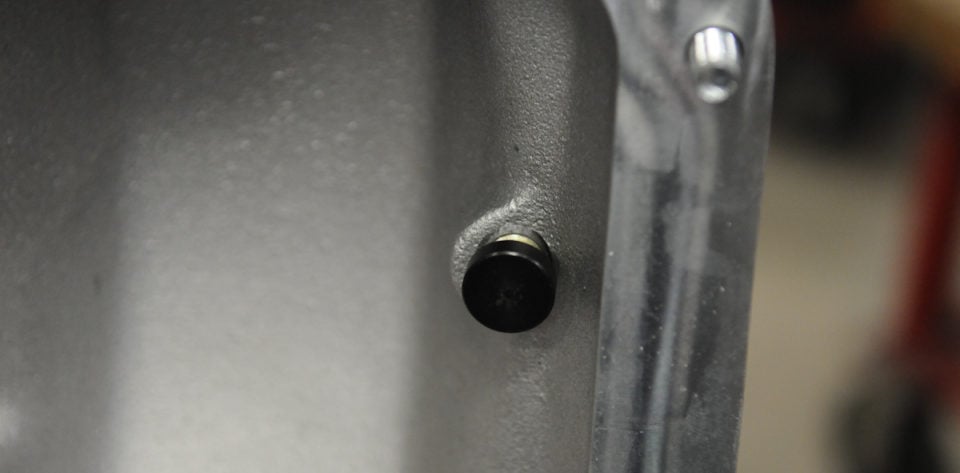 [27]
[27]
Taking the design of this Dana 60 style housing into account and the tendency for the pinion to place outward force on the carrier caps, Moser has implemented these pre-load bolts that are torqued to seven in/lbs and provide added support for the caps from the rear.
This customer requested his Moser 60 have a centered Pinion rather than a standard half-inch offset, meaning the axles won’t be of the same length. The longer of the two axles goes into the passenger side of the housing and the shorter on the drivers side.
 [28]
[28]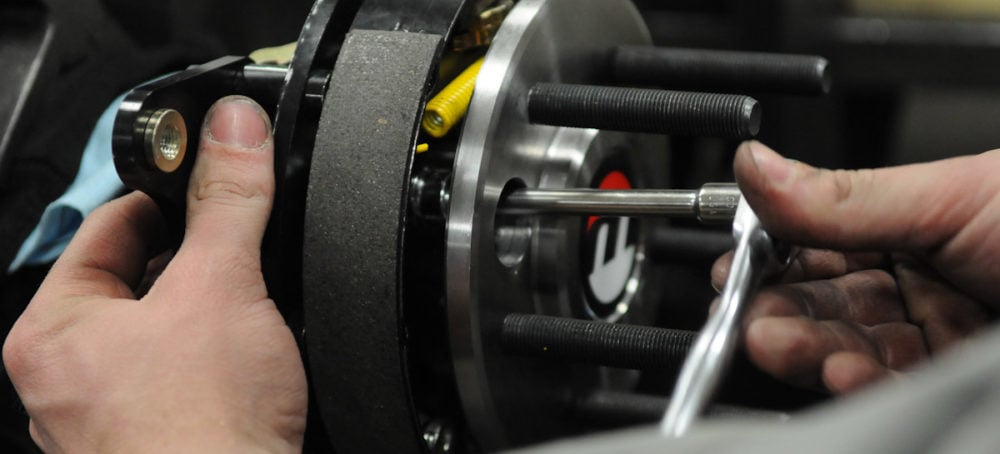 [29]
[29]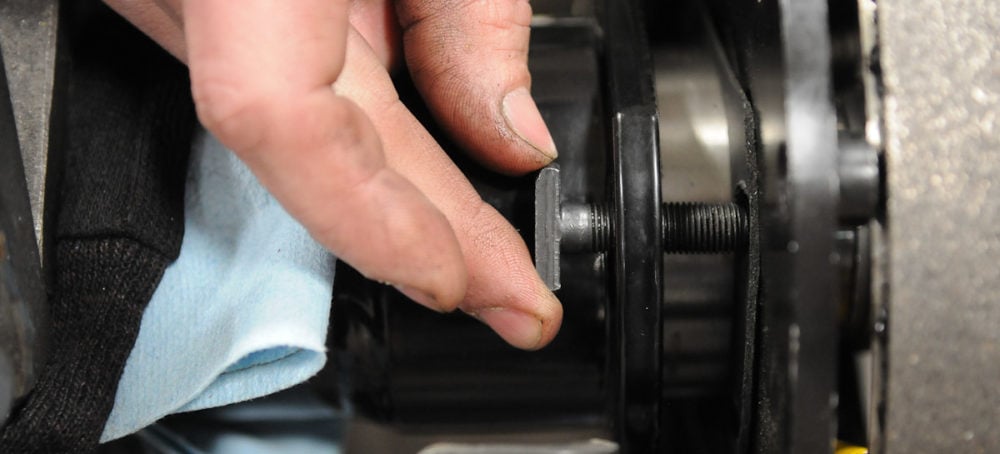 [30]
[30]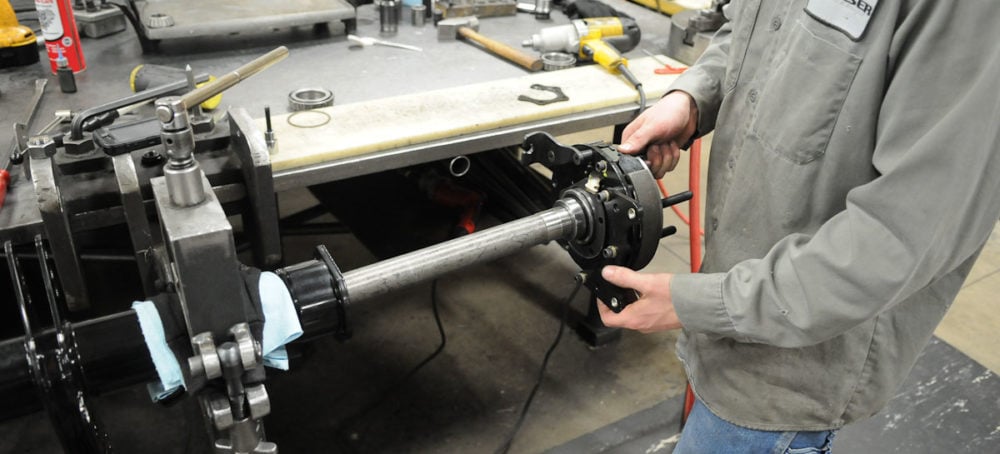 [31]
[31]
With the Wilwood e-brake assembly assembled onto the axle, it's then installed into the housing. The entire axle, e-brake, and brake hub assembly are held in place using C-clamps on the opposing side of the axle bearing from the axle housing flanges.
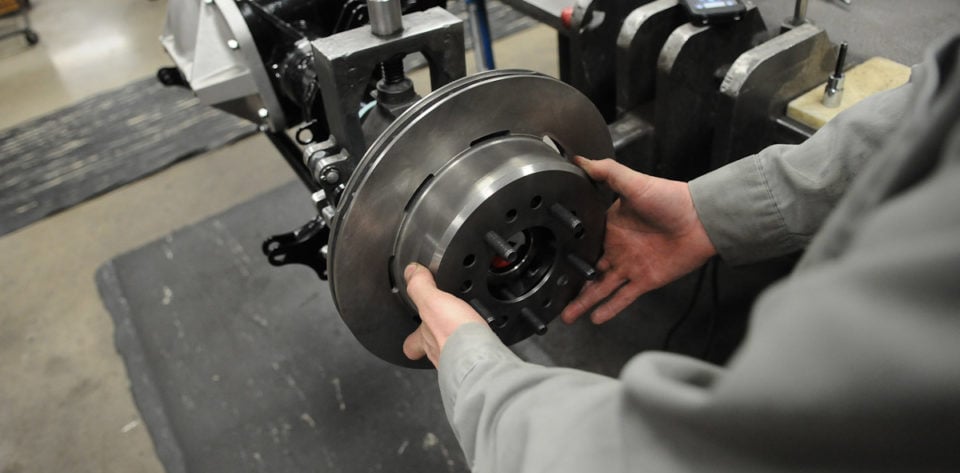
Before sliding the axles into the housing, we must install the Wilwood brake caliper brackets to the axle. These slide over the bearings and install quickly and easily. From here, the axle seals are tapped into place, followed by the axles with the e-brake assembly installed. Once the axles are in, the axle and brake assembly is bolted up to the housing flange. Finally, the brake rotors and brake calipers are installed and the brake and e-brake lines connected to bring our assembly to a close.
 [32]
[32] [33]
[33] [34]
[34] [35]
[35]
Installation of the Wilwood brake rotors and calipers and connecting of the brake fluid lines and e-brake cables brings the assembly of this Moser 60 Muscle Pak housing to a close.
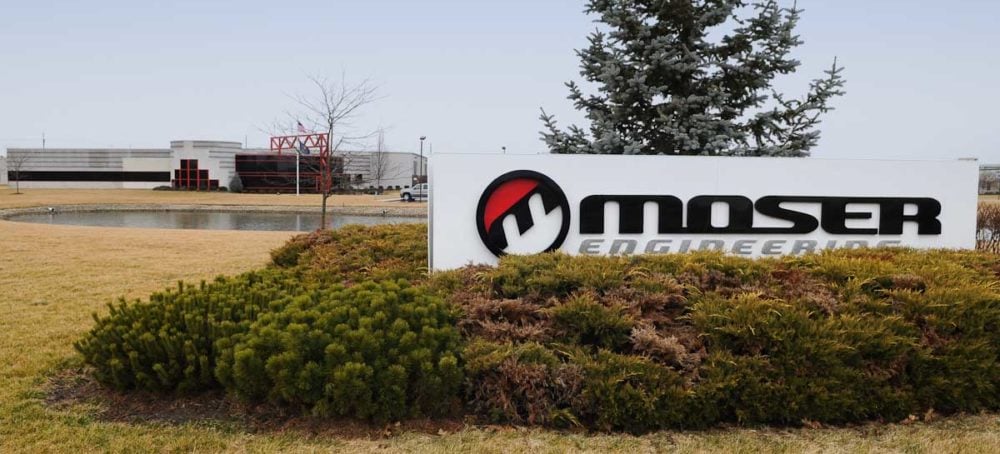
A Look Around The Moser Engineering Campus
 [36]
[36] [37]
[37] [38]
[38] [39]
[39]
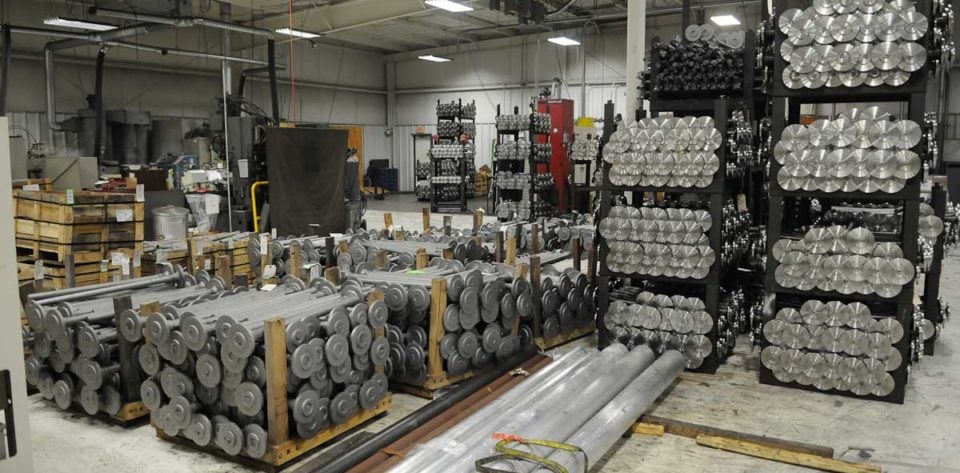
Between the two facilities, Moser Engineering has in excess of 100,000 square feet of manufacturing space under roof and employs roughly 70 highly-skilled employees; many of whom have worked there their entire adult lives. In fact, the original employee that went to work for Greg Moser when the company was founded still calls it his place of work.
 [40]
[40]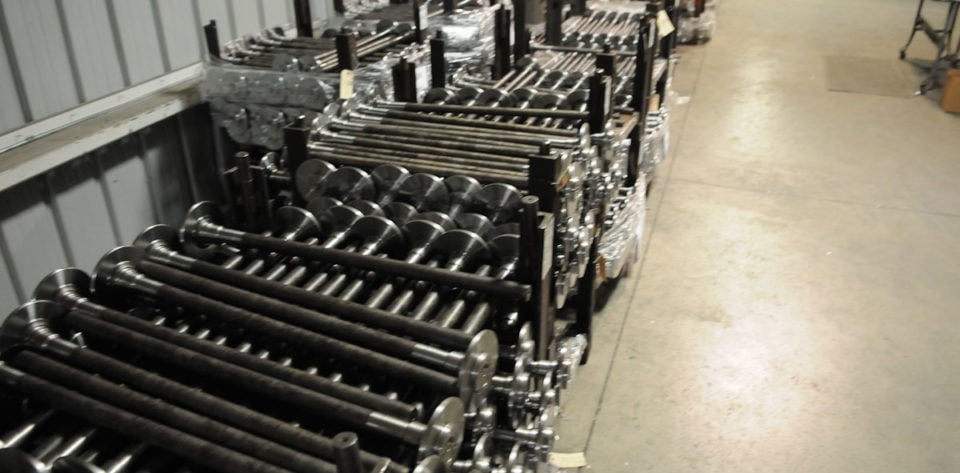 [41]
[41]
 [42]
[42]When components are sent in by customers for repair, re-splining, re-alignment, or other work, they're staged here and inspected by the Production Manager, prioritized and sent to respective departments, and turned around within two days. Moser will accept components even from competing manufacturers. "Times are tough and guy don't necessarily have the money for a whole new housing, so they'll send us what they have, regardless of the manufacturer, and ask us to narrow the housing or install a set of our axles," explains Anderson. "We're okay with that."
 [43]
[43]From complete center sections to performance covers, C-clip eliminators, yokes, and more, Moser Engineering is hands-on with virtually every aspect of the products that they offer. Because all facets of manufacturing and casting is done on the Portland campus (at Moser or the Performance Tool division next door) or the nearby foundry, product designs can be altered if need be in short order.
 [44]
[44]Just one of many carts of axles completed or nearly completed and ready for assembly or shipping by roughly 9:30 in the morning.
 [45]
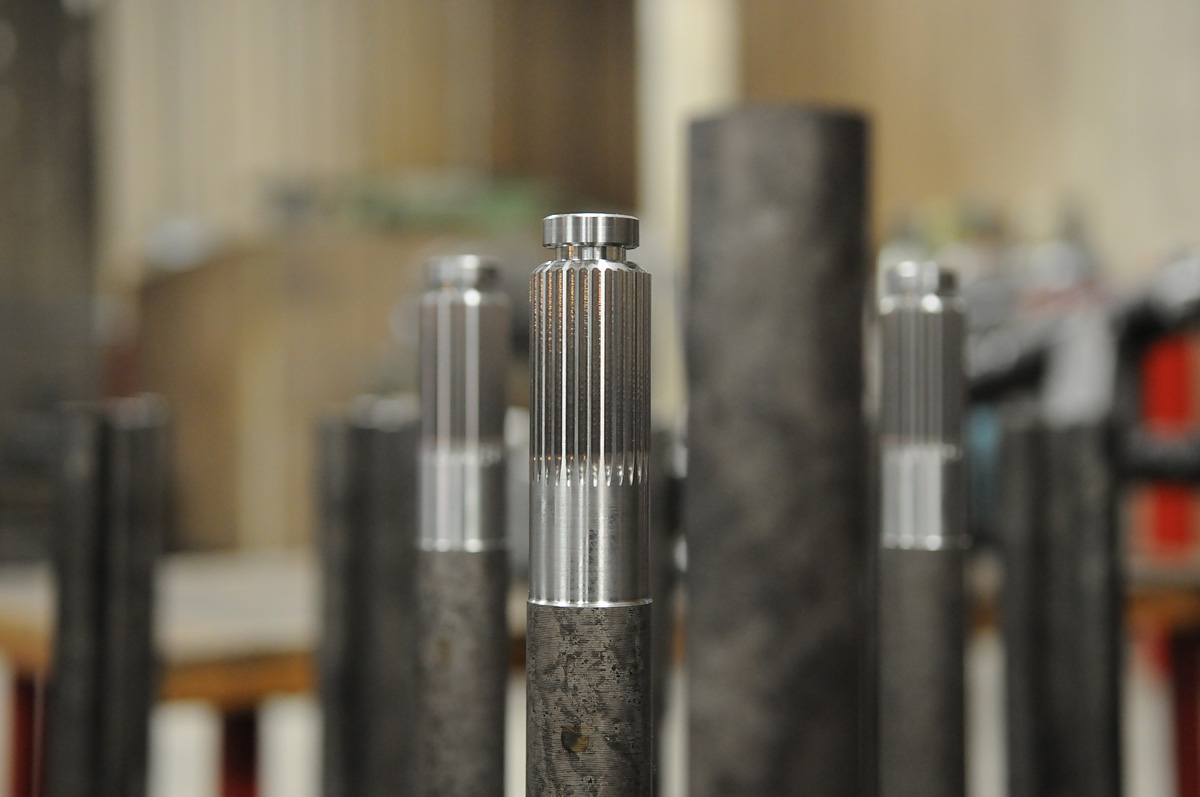
[45]Moser's forged raw axle cores are originally manufactured to a standard length and then cut to size for the specific application.
 [46]
[46]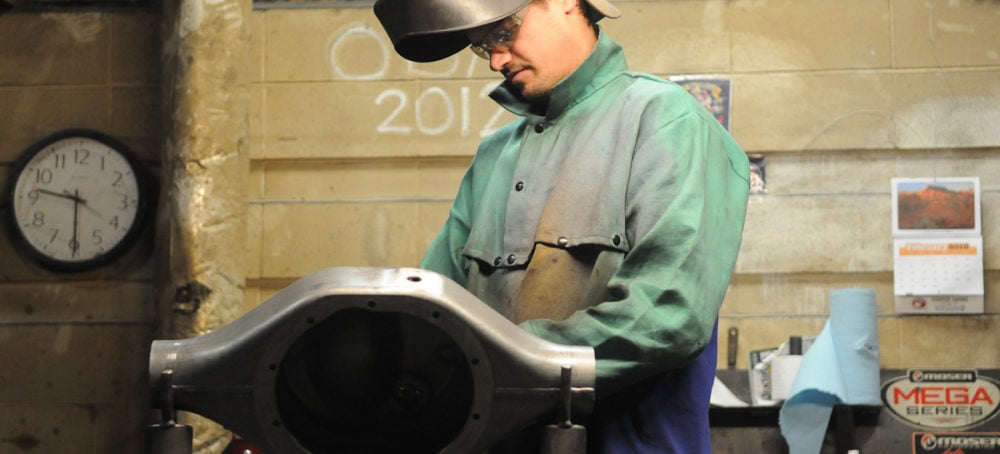 [47]
[47]
All of Moser's fabricated housing are created here by a team of expert fabricators and welders, by hand. Due to fluctuations in customer demand, a low volume of nine-inch and other housings are run and maintained as inventory. This is also where housings sent in to be modified would be attended to.
 [48]
[48]Here, a housing is shown with an alignment bar placed through the center of the can, which is used to help align the tubes as they're welded.
 [49]
[49]Knowing that racers' chasing points need their parts quick, Moser has long put the needs of the customer first, and the result is a roughly two-day turnaround on nearly any job sent in.
Seen here is the large inventory of rough forged axle cores ready for machining and splining. Here you can see a comparison of rough cast and aluminum parts alongside the finished product. At left, axle bearings are press-fit onto the axle shaft, while at right, the same machine presses the wheel studs into the axle faces. [40]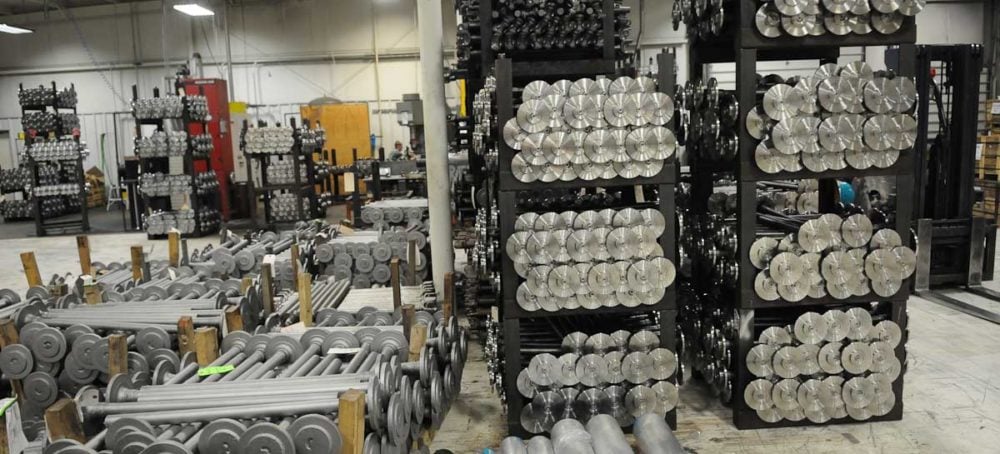 [50]
[50]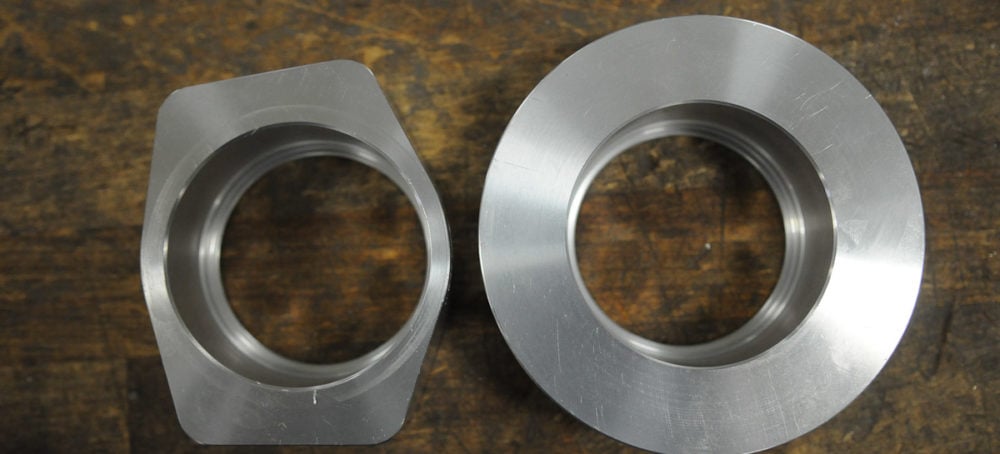 [51]
[51]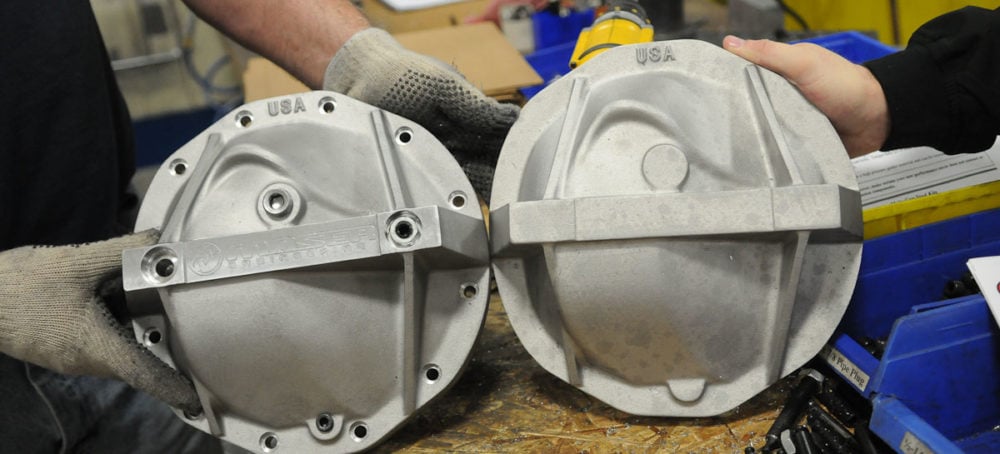 [52]
[52]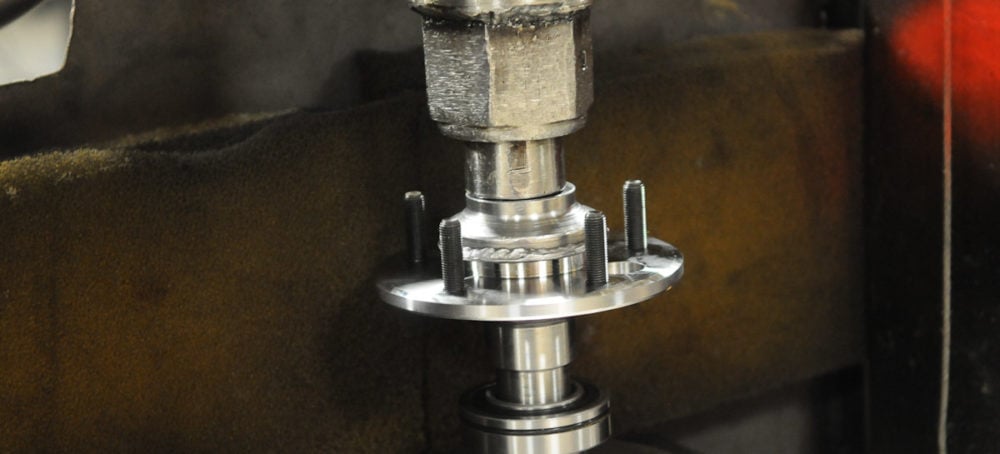 [53]
[53]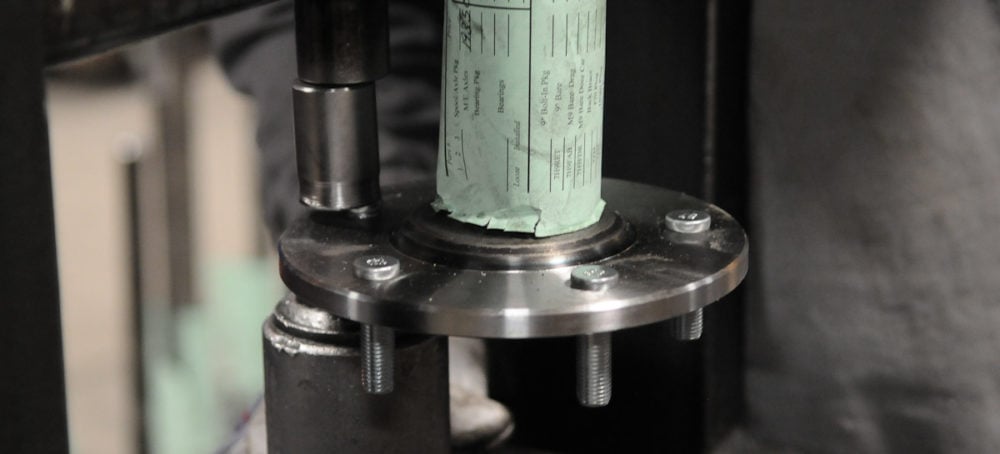 [54]
[54]
 [55]
[55] [56]
[56]
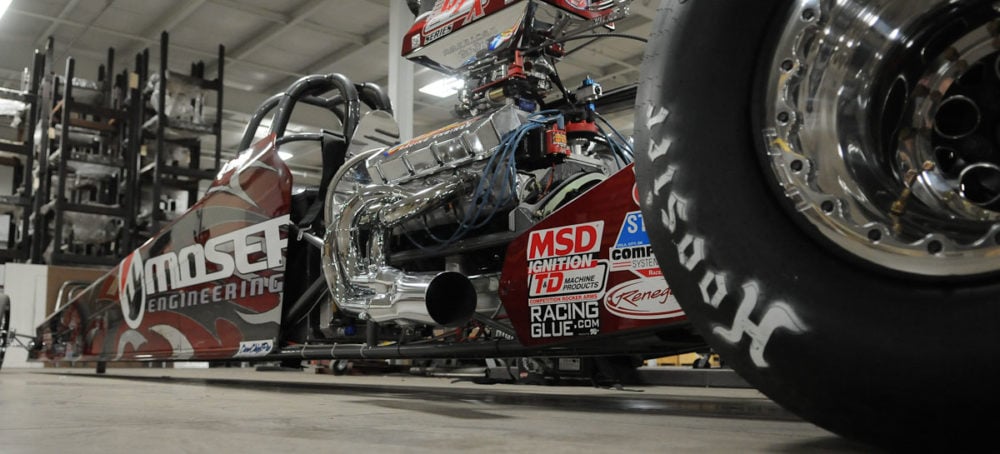
A pair of Moser Engineering's in-house dragsters, campaigned by Moser New Product Development Team Leader Tim Irwin and company President Rob Moser's son Justen Moser.
 [57]
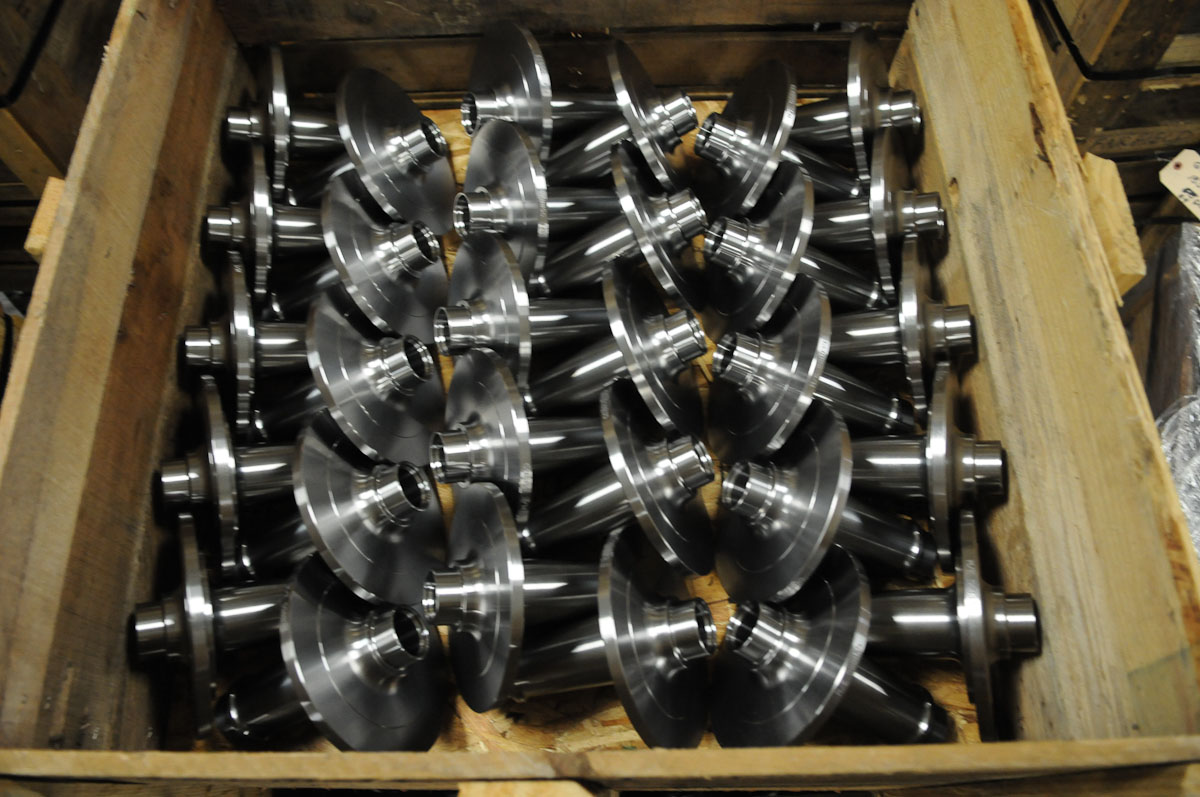
[57]A crate of spools awaiting final machining at the Performance Tool building located adjacent from the main facility.