During the first round of modifications to our new C5 autocrosser project, we centered our sights on upgrading the engine for improved breathing using a variety of parts. Those parts included a new camshaft from COMP Cams and one of FAST‘s LSX intake manifolds along with the necessary supporting gear. These items were specified in order to achieve a wider powerband and broader torque curve for our autocross-destined machine.
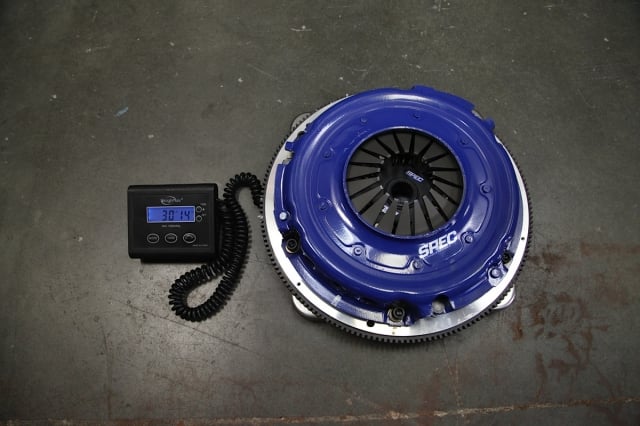
This article is the second installment of the modifications performed to our C5 and highlights the brand-new performance clutch from the team at SPEC Clutch in Alabama.
The clutch in our machine was whipped, so we decided in the interest of preparing the car for future power increases it would be a good idea to be ahead of the curve with a new clutch upgrade.
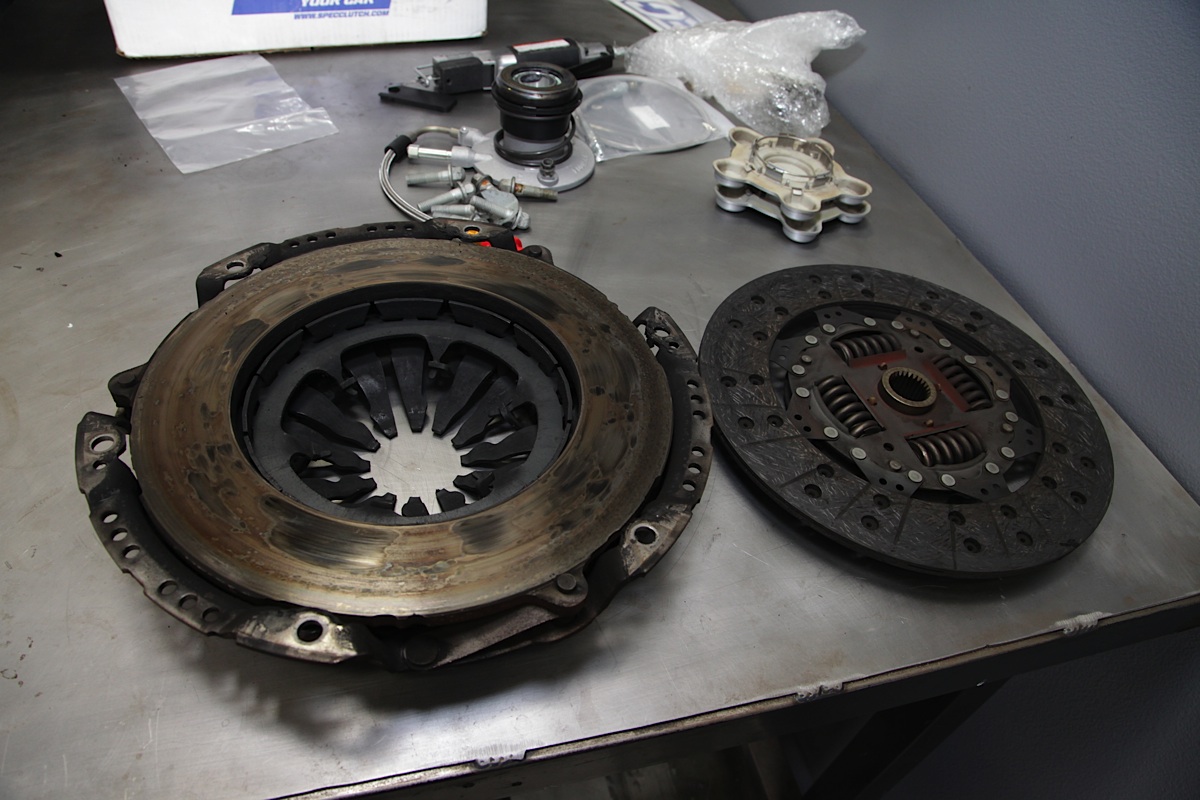
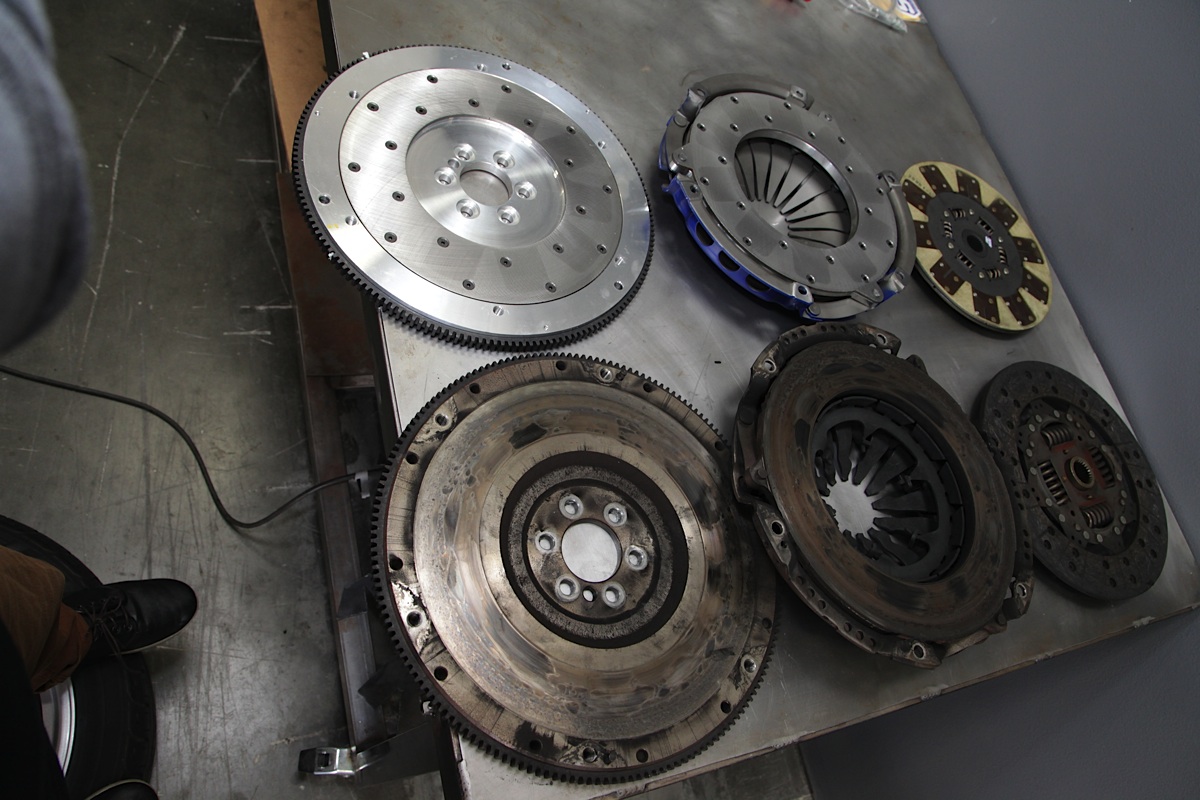
As you can see from the condition of our old clutch, it was definitely time for replacement. You can easily see the burned areas on the pressure plate where the disc was not making contact properly.
Now that we have the engine portion of the project well in hand, with solidly-documented results (an improvement of 26.2 horsepower and 28.4 pound-feet of torque) that displayed large gains under the curve, SPEC had specific suggestions regarding clutch replacement in our C5.
An effective autocross clutch must allow for quick shifts and an engagement that can be modulated for smooth launches and application of power. – David Norton, SPEC

The All-Aluminum Fix Is In
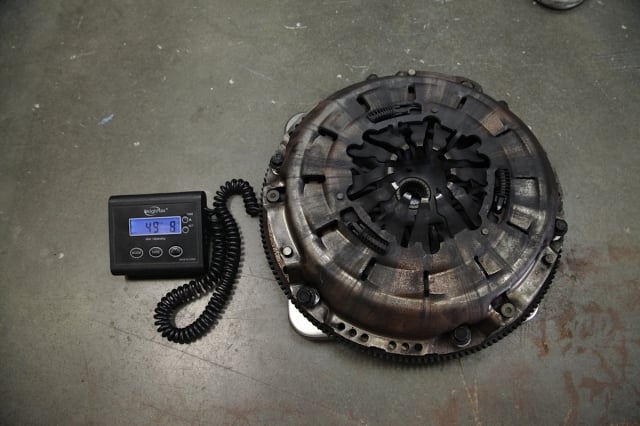
The decision was made to install one of SPEC’s Stage 2 clutches, complete with aluminum pressure plate. The Stage 2 clutch was supplied with a full Kevlar facing that utilizes a steel backing for strength. By using the Kevlar facing on the clutch, excellent drivability is retained, yet longer life is achieved thanks to the Kevlar’s stout wear properties.
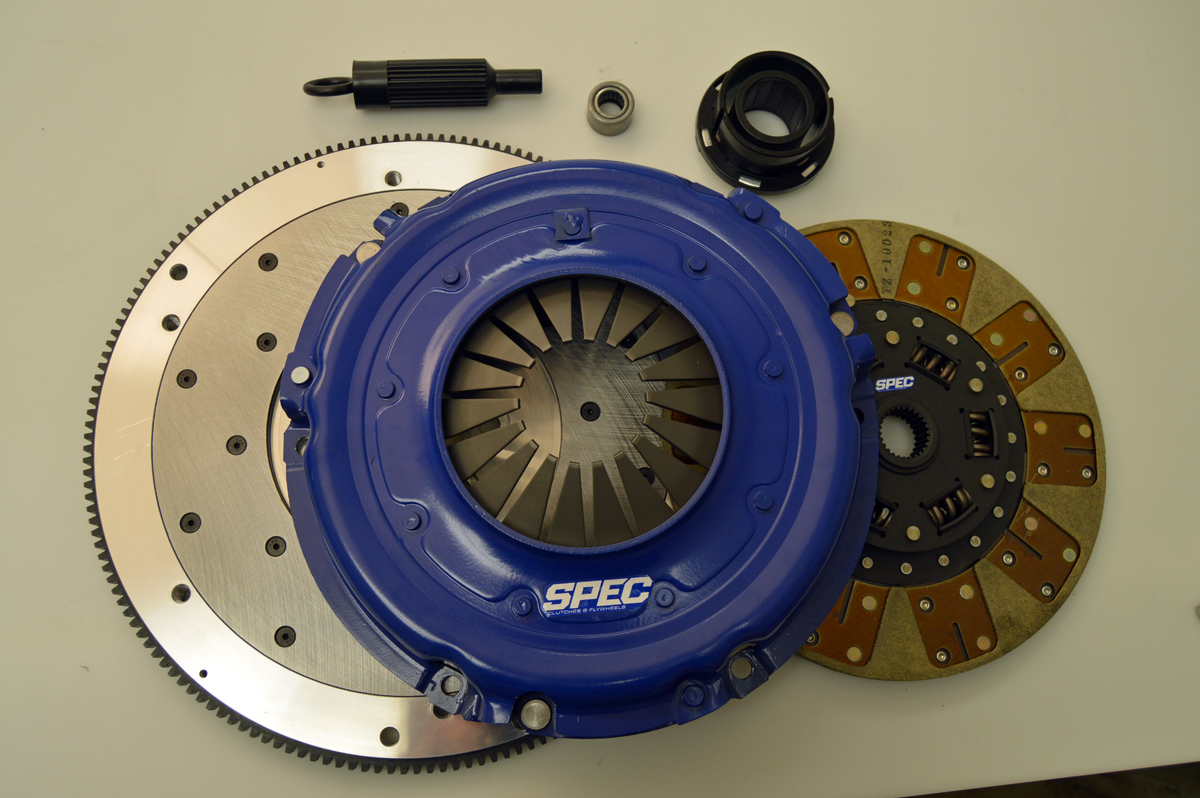
The all-aluminum construction of our new clutch will dramatically reduce rotating weight while retaining excellent clamping properties.
The clutch hub is double-sprung with spring cover reliefs that provide flexibility, and all of the clutch components are heat-treated for strength and durability. It’s recommended for street, drag, and autocross applications, but as with any clutch selection, it’s best to call the manufacturer to ensure you’re getting the right product for your needs.
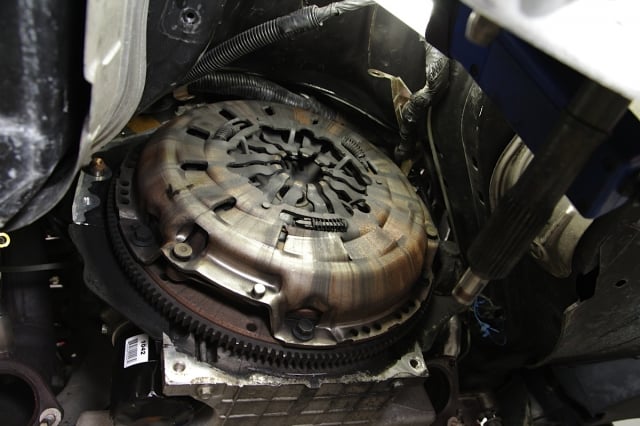
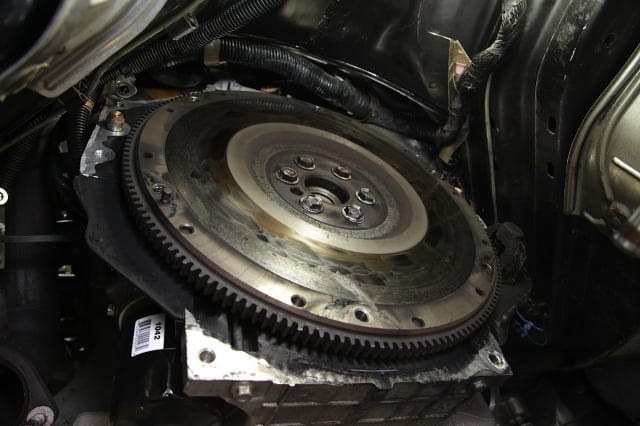
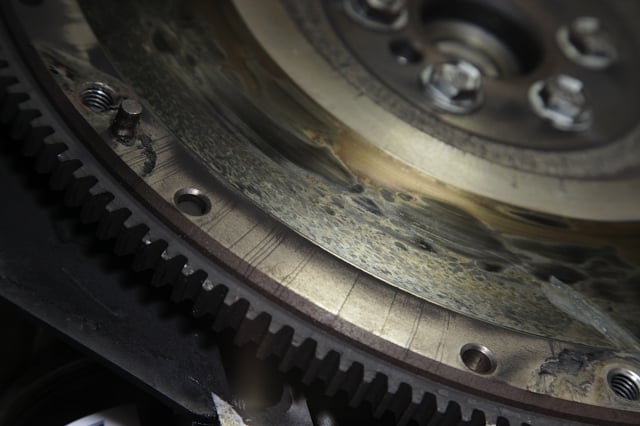
Left - The stock pressure plate shows evidence of fluid leakage, which will cause the clutch to not apply properly. Middle - Our stock flywheel also showed that the clutch was not applying consistently. Right - A closeup of the burned flywheel areas.

Good Things in Small Packages
“The unit we supplied features our aluminum pressure plate for rotating mass reduction and rebuildability. The diameter of the unit is also custom,” says Norton. “This kit utilizes a 10.5-inch diameter versus the popular aftermarket 12-inch diameter.”
“The smaller diameter obviously reduces rotating mass, but also improves shifting because of the lower disc mass. At the same time, it provides ample capacity for big power builds. The weight reduction from the pressure plate alone is 7.2 pounds, and the flywheel weight reduction is 12 pounds. A 19.4 pound reduction is substantial for performance, yet drivability does not deteriorate accordingly in the C5 application.”
Norton says, “This clutch features a Kevlar fiber disc for manageability. The material wears well, engages smoothly and provides enough friction to hold 550-plus foot-pounds of torque with the smaller diameter (10.5-inch) configuration.”
There were a few stock C5 clutch designs, with disc diameters in the 11.75-12.0-inch range, but our replacement clutch has a 10.5-inch diameter.
There are a number of reasons for this, namely a reduction in mass (which is basically a free horsepower increase) and better shifting characteristics, which will be important as we navigate those parking-lot cones.
“This kit is good for autocross because it is a smaller diameter than stock, yet there is no drivability loss and it will still hold a lot of power. So the inertia reduction from the smaller diameter helps increase rate of rev, as well as introduce smoother shifting from due to the lighter disc,” he explains.
“It was delivered with the aluminum pressure plate option, which further reduces mass. So what you ended up with is a super lightweight unit that still drives nice and holds a lot of power, and one that is manageable for autocrossing.”
SPEC offers the choice of a segmented or full face material on the disc depending upon application.
More Mass Reduction
Not only did we pull a bunch of weight out of the driveline by reducing the mass in the pressure plate and clutch disc – we also took this chance to replace the flywheel in our Corvette.
SPEC’s billet flywheels are developed for each particular vehicle and the specific driving environments that vehicle will see. They are recommended based on how the car reacts to changes in rotating mass, and are tuned to take advantage of that mass reduction.
Our flywheel is machined from billet aluminum and is manufactured to a .001-inch machining tolerance. This tight specification helps to guarantee a flat seating surface for our new clutch and offers smooth rotational qualities to provide a perfect balance. The new flywheel removes a whopping 12 pounds of rotating weight from the rear of our engine.
Old versus new - you can see just how much spinning mass we were able to remove just by simply replacing the clutch and flywheel assembly.
The Juice Is Loose
The issues relating to the C5’s hydraulic system are well-documented on the Web, and a quick Google search will turn up a number of suggested solutions. Norton suggested to keep the fluid fresh with DOT3 or DOT4 fluid only, and to make sure that the system is properly bled.
“SPEC also equipped us with a replacement hydraulic slave and bearing assembly,” says car owner Jason Snyder. “The slave is critical to the clutch operation, and upon removing the factory slave we quickly learned why I was experiencing clutch fade; the OE slave had literally fallen apart and was bleeding off fluid and pressure.”

Our new release bearing with remote bleeder assembly – this makes the job of bleeding the hydraulic system much easier.
In an effort to keep issues at bay, we requested one of SPEC’s remote bleeder kits when we placed our order. According to Norton, “Our remote bleeder kit makes bleeding the C5 system much easier. The dreaded ‘crashed pedal’ syndrome can be avoided, even with stock hydraulics, by keeping the system clean, which prevents seal deterioration and fluid blow-by. C5 slave cylinders get a bad rap through conversation, but they are very decent and rarely an issue. Remember when troubleshooting that if you don’t have a fluid leak in the bellhousing, the slave is not a likely culprit. They wear well when being fed clean fluid by the master cylinder.”
Clutch Specifics
You may remember our recent article on clutch technology where we discussed what an end-user would be looking for in a performance replacement clutch.
The limitation to a single-disc clutch has always been ultimate torque capacity, as the surface area on the clutch face can only be so large, and the clamping force can only be so high before the clutch starts to slip. With the Stage 2 clutch, we’re able to achieve the clamping force we need without stepping up to a twin-disc clutch (which isn’t necessary at our power level), yet we retain the stock-type driving characteristics, which is great for a car that will see some street duty along with the autocross – there won’t be any lead-leg feeling after getting out of the car.
Install Details
The task of installing a clutch in a C5 Corvette is not a job for the faint-of-heart, but if you’re good with a set of tools and wish to do it yourself, plan for at least a weekend to do the job correctly. Since we are space-limited, we’ll cover the high points here, but it’ll be a big help to you if you can locate a buddy or mechanic that’s done the job before. Air tools are also an advantage.
Basic Tools You’ll Need:
- Mechanic’s hand tools
- Long extensions for bellhousing bolts
- Flexplate wrench
- 5/8 fuel line quick-disconnect wrench
- An extra set of hands (or three!)
- Pilot bushing removal tool (borrow or rent from your local auto parts store)
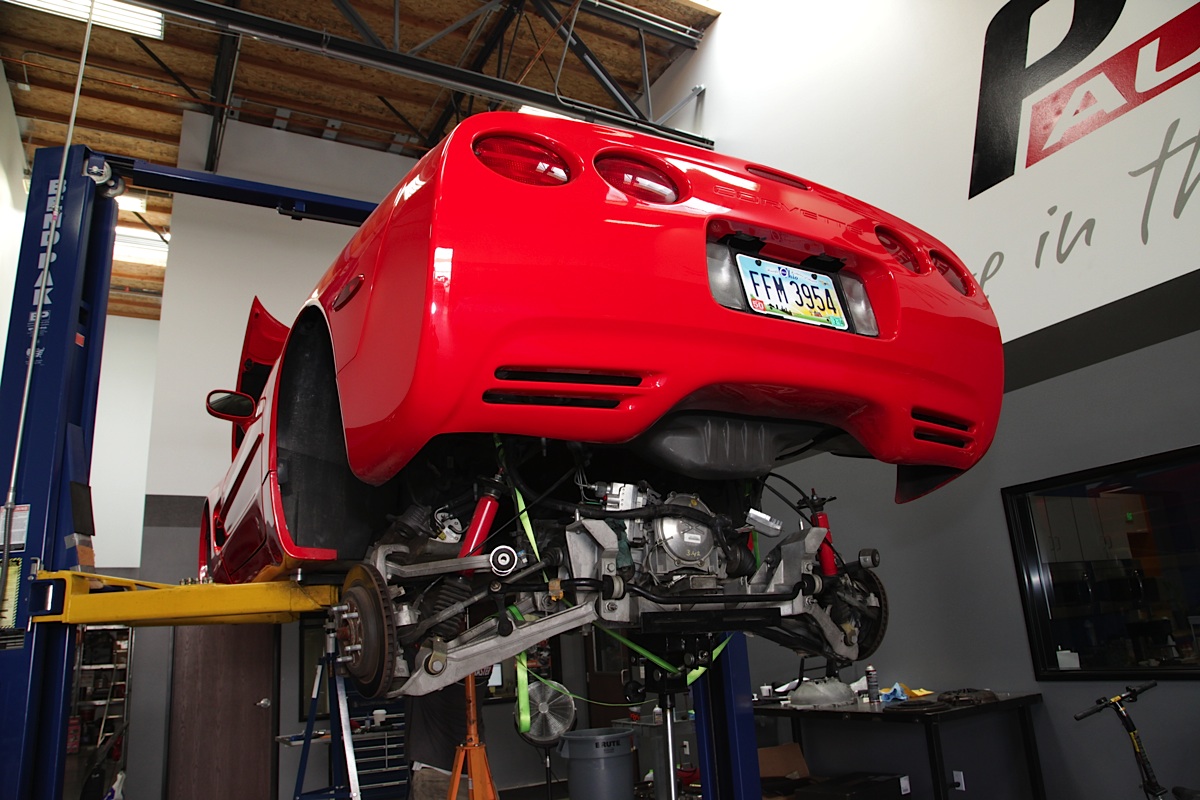
It’s easiest to use a lift, but this job can be completed using jackstands and a couple of transmission jacks. The entire driveline from the torque tube back needs to be removed from the chassis.
The first order of business is to find yourself a set of jackstands – the taller the better, or, if you have access to a lift, break out your wallet and buy the owner of the lift a case of beer or three. The higher you can have the front of the car, the easier your job will be.
Once you have the car up in the air, remove the rear wheels and the rear brake calipers in preparation for lowering the rear subframe. Remove the top bolts on each shock, then take out the 18 mm bolts atop the upper control arm. Pull out the halfshafts, then you need to take out the two-pin wiring harness near the emergency brake, and remove the e-brake cables themselves. There are three tabs on each brake cable, so they can be a bit tricky to get out of the mounts.

Removing the retaining nuts from the tunnel cover to get the rear cradle out of the car.
Get the exhaust out of the way by removing the clamps on the over-axle pipes where they connect to the midpipe, then remove the midpipe itself. There are 36 (!) bolts in the tunnel cover – that’s the next step, and where the air tools will come in handy.
Helping Hands
Since you will be removing the transmission and torque tube in one piece, it will be a good idea to have more than one transmission jack to support all of the pieces as they come out of the car. The shifter is removed after pulling out the center console and radio surround. There are four 21 mm nuts holding the rear suspension cradle in the car – remove those with a wrench, and slowly drop the drivetrain down, but not out. There will be a number of wiring harnesses to disconnect, so pay attention for those as you come down.
There is a quick-disconnect fitting that leads to the slave cylinder; it’s best to disconnect that with 5/8-inch quick disconnect tool, the same ones you’d use for air conditioning lines. These can be purchased at most auto parts stores.
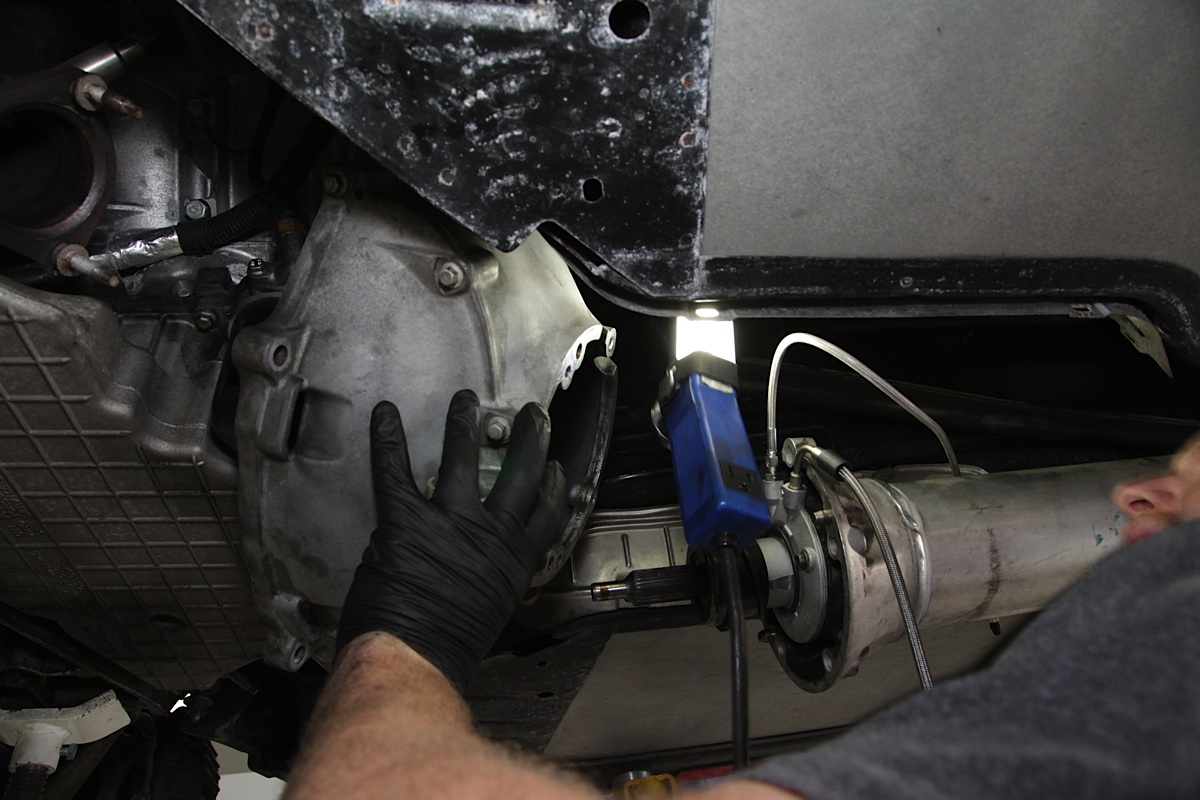
Disconnecting the torque tube from the bellhousing.
13 mm bolts hold the torque tube to the bellhousing; those get removed next, but you need to ensure that the oil pan is supported with a jackstand so that the engine won’t tilt back and make the reinstallation process a bear.
Now it’s time to remove everything from the car. Pull the torque tube backwards, disconnect the wiring harness on top, and pull the rest of the electrical connectors away from the transmission. Slowly remove the drivetrain from the car, and keep watch for other connectors to make sure you’ve caught everything on the way out.

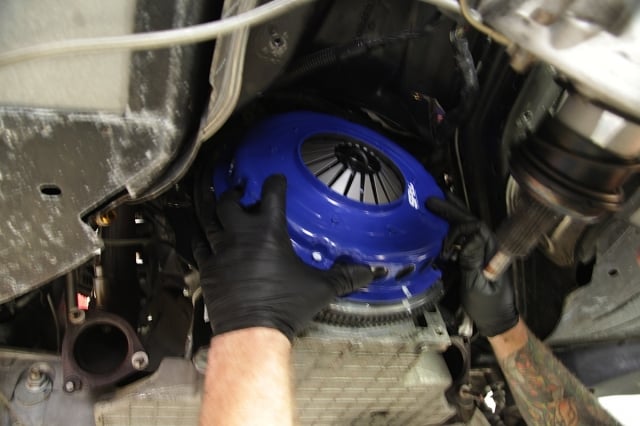
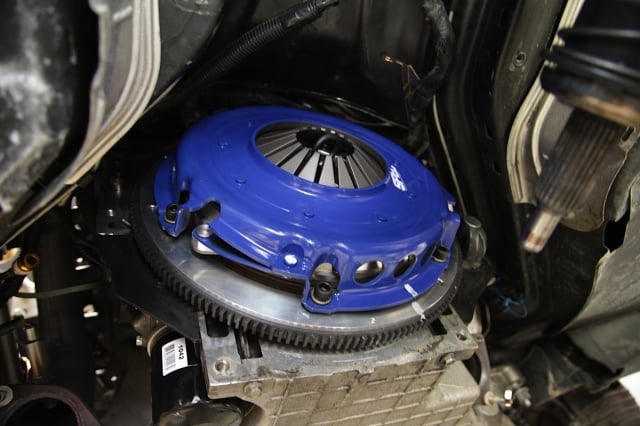
Six bolts remove the flywheel from the rear of the engine. This is our new aluminum flywheel set into place. It only lines up one way.
At this point, you can remove the 13 mm bolts from the bellhousing, remove the pressure plate bolts, and the pressure plate and clutch disc can be removed at this point. There are six 15 mm flywheel bolts to be removed next. Be careful, as these parts are heavy and will take a fingertip if you’re not careful.
The Right Tool for the Job
Removal of the pilot bushing has been and always will be a pain in the rear. Rent the tool from your local auto parts store, and have at it. This is the part of the job you’ll hate the most, but it’s a necessity in order to replace the bushing with a new one. It can take a few hours, lots of cursing, and a beer or three, but stick with it – you’ll get it. Just take care, no matter what you do, to NOT damage the rear of the crankshaft, or installation of the new bushing will have you hatin’ life.
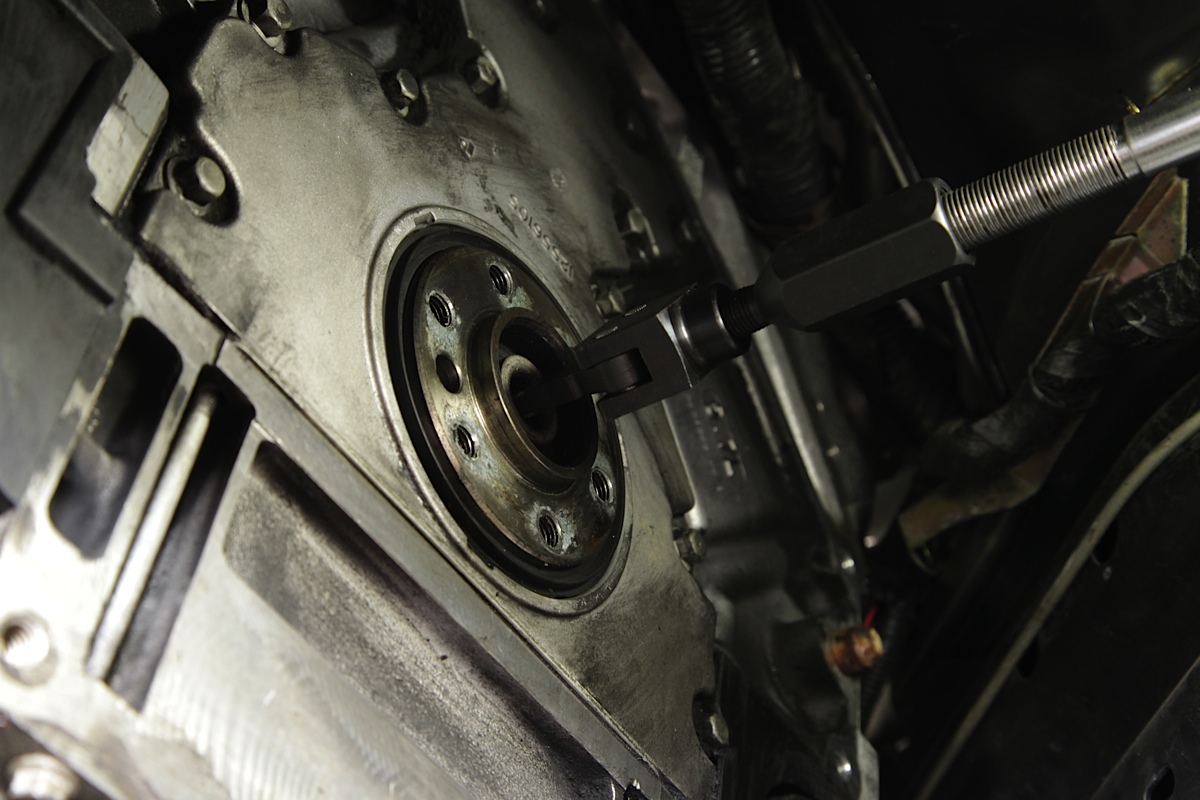
A special pilot bearing puller can be rented at your local auto-parts store. Even so, plan for an hour or two during this step of the installation – it can be a bear.
Once you get to this point, and the old bushing has been replaced with the new one, it’s time to put everything back into the car. Reinstallation of the new clutch should follow the directions provided with the new unit. Thread locker should be used on the flywheel bolts to prevent them backing out.
Ensure the face of the flywheel is absolutely clean, install the clutch using the provided alignment tool, and replace the slave cylinder using the new one you’ve purchased from SPEC.
Reinstallation of the rest of the driveline parts comes next. Slow and steady is your friend, and a C5 shop manual is an absolute must for when you don’t recall what came off of where. Or, you could hire a shop to do all of this work and just happily pay the bill at the end.

Installation of the clutch assembly should be done using the appropriate type of thread locking compound on the flywheel bolts so they don't back out. Follow the rest of the provided instructions to replace the components, and reverse your removal steps to finish up.
The Final Destination
“The SPEC Stage 2 clutch package is a surprising upgrade to my ’97 Corvette,” Snyder says. “As the OE clutch and hydraulics have worn over time, you don’t realize how much performance is lost through the clutch. When aggressively laying into the new SPEC clutch for the first time, it was like a whole new driving experience. The pedal feel is much more solid, yet it retained the light pedal of the OE clutch. The Stage 2 kevlar disc material grips aggressively with little to no chatter upon engagement. From the pedal feel to the instant bite when banging gears, I have to say that the clutch upgrade for me is perhaps the Corvette’s most impressive improvement to date. After all, without a good clutch all of the engine performance upgrades could not have been realized,”
No matter who replaces the clutch in your C5, you need to take the time to break it in properly. This is typically 300-500 miles of driving in a number of different conditions, and once that process is complete, you’ll be able to hammer on it to enjoy the fruits of your labor.


