 [1]
[1]
If you own it, you should drive it. At least that’s the consensus among car owners that see no point in owning a vehicle if it’s just going to sit in a garage or be trailered to an occasional show. While the debate on this is still hot and heavy in the automotive community, we’re finding more and more people with the “drive it” mentality. Of course, we’ve fit into that group of enthusiasts for years and aim to get every ounce of driving pleasure out of our project cars. That’s why we recently set our “Y2K” project Corvette up with a C5 Line Loc Kit and a LNC-002 Launch Control system, both from Lingenfelter Performance Engineering [2]. After all, we don’t just want to drive our cars, we want to race them and do it well.
 [3]
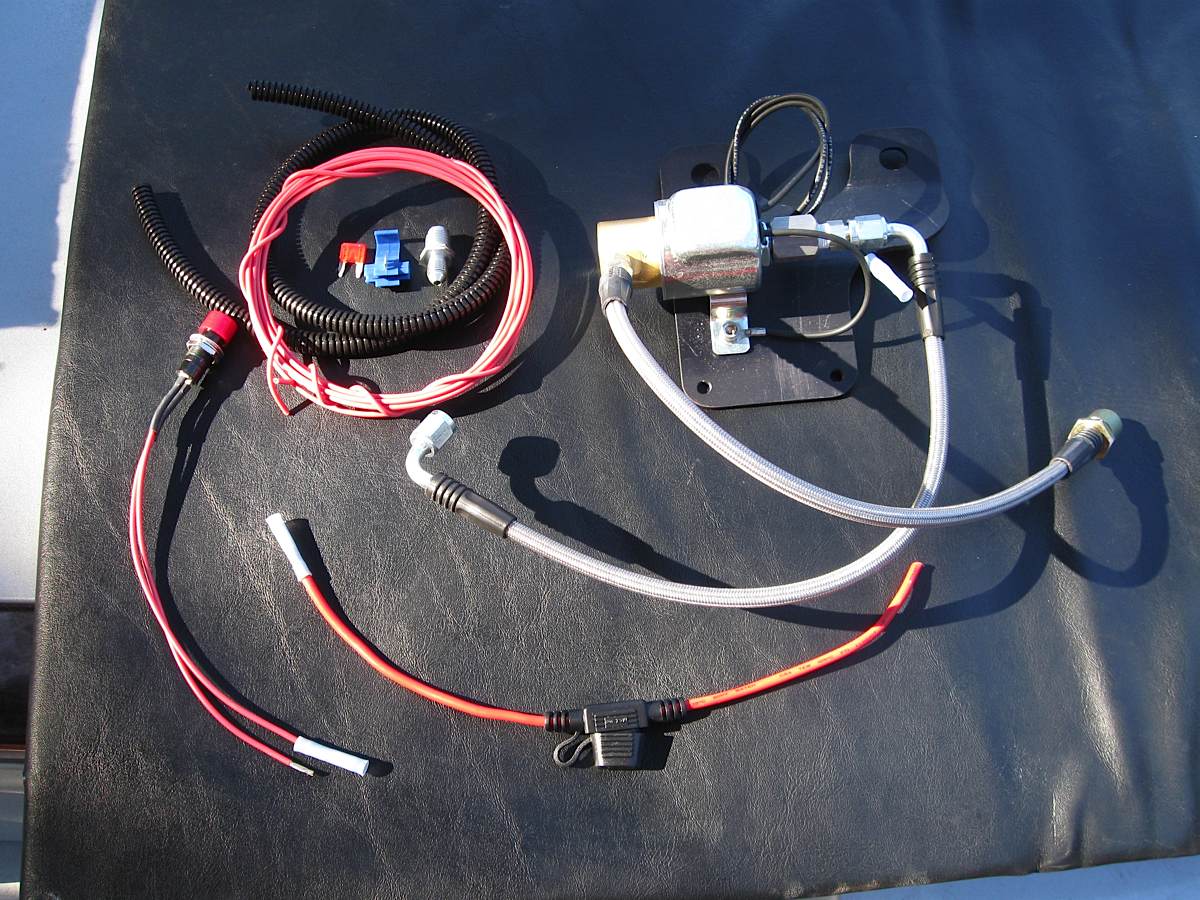
[3]The Line Loc Kit sold by Lingenfelter comes with everything you need to install a brake control system on your Corvette. With just a few basic tools required, this is about as plug and play as you can get.
Hold It!
Line locks are great when it comes to getting an adequate burnout and stellar reaction time on the drag strip. Although line lock devices are called many different things depending on the company selling them, they all share the same basic premise of locking the front brakes with the push of a button to be able to keep your car in position for burnouts as well as preloading your clutch and transmission for race launches without standing on the brakes.
A line lock provides several benefits including making it easier to perform a burn-out, easier to stage the vehicle and concentrate on the tree (timing lights), and to make it easier to load the vehicle up against the torque converter. – Jason Haines

“A line lock kit is primarily recommended for drag racing customers,” Lingenfelter Project Director Jason Haines explains. “A line lock provides several benefits including making it easier to perform a burn-out, easier to stage the vehicle and concentrate on the tree (timing lights), and to make it easier to load the vehicle up against the torque converter. It also reduces wear on the rear brakes when performing a burn-out.”
Because we take Y2K to the dragstrip on a regular basis, it was a no-brainer to add a line lock system. We hit up Lingenfelter and they hooked us up with a C5 Line Loc kit. This kit comes complete with everything you need to install a line lock on your C5 Corvette, including high pressure stainless steel braided hoses, a 10-foot, #14 AWG wire with splice fitting, the 12V solenoid mounted on a bracket, a momentary push button, a fuse holder and 10 amp fuse, adapter fittings and an instruction manual.
If you’re not knowledgeable on how to bleed hydraulic brakes, RSD recommends having someone who is install the Line Loc Kit.
“This line lock kit is different in that it is specifically designed to fit the C5 Corvette so you don’t have to custom make a bracket or bend brake lines to make it fit,” Haines said. “It also has vehicle specific installation instructions.”
 [4]
[4]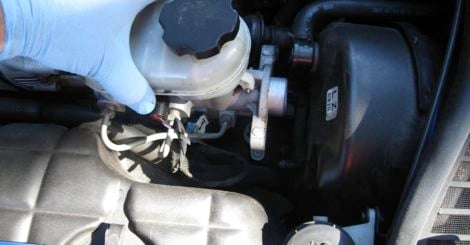 [5]
[5]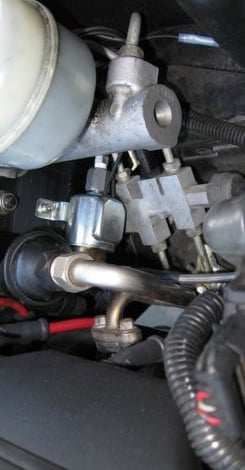 [6]
[6]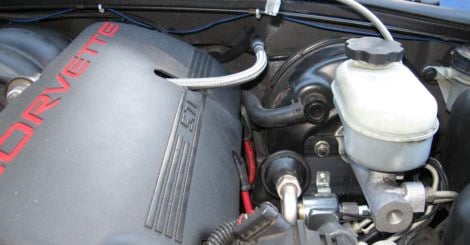 [7]
[7]
By removing the bolts from our master cylinder, we were able to mount our line lock solenoid easily before tying everything back together again.
Grace Under Pressure
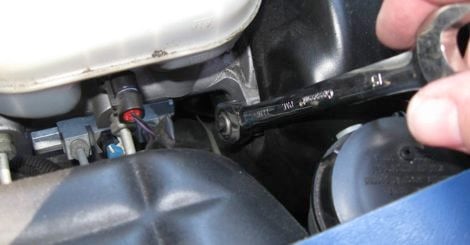
Thanks to the included instruction manual, installing our line lock was rather simple. The first thing we did was mount the solenoid bracket. This component fits on the mounting studs of the master cylinder so we unbolted it from the power booster vacuum canister to allow the bracket and attached solenoid to slip into place before rebolting everything together.
 [8]
[8]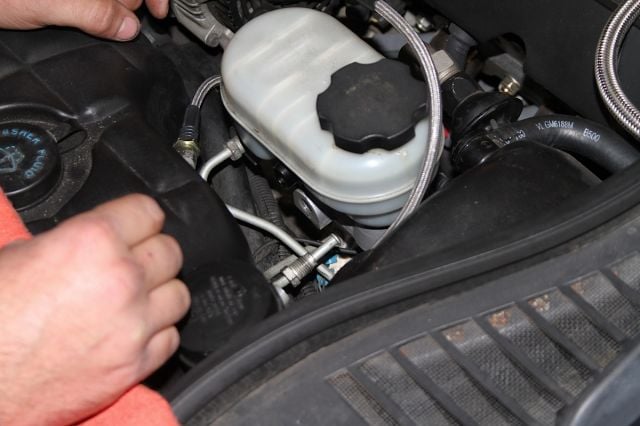 [9]
[9]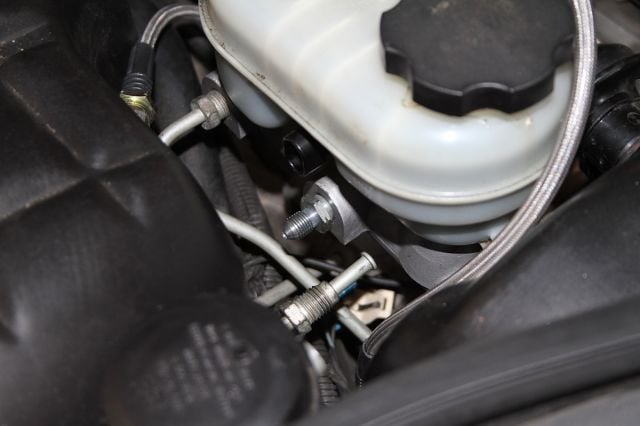 [10]
[10] [11]
[11]
Following along, you can see how simple it was to connect the supplied hoses to the Line Loc solenoid.
Next was making the brake line connections. The solenoid does its magic by sealing off brake pressure to the front wheels – step on the pedal, hold down the button, let off the brake pedal, and the front brakes still hold while the rear wheels are free to turn. In order to do this, the solenoid gets connected between the front brake output port on the master cylinder and the factory brake lines via the included race-quality stainless steel high pressure hoses.
After removing the front brake line from the rear port of the master cylinder, we screwed the provided adapter fitting into the port. We then attached one end of the supplied stainless steel hose with the 90 degree fitting to the adapter and the other end to the forward facing port on the solenoid. The other hose was then attached with one end connected to the adapter fitting on the brake line that was removed from the master cylinder and the other end connected to the driver’s side port on the solenoid.
 [12] Bleeding the front brakes was the final step of the installation, so we removed the front wheels and used our Phoenix Systems [13] Brake Bleeder. We’ve used a lot of methods to bleed brakes in the past, from the two-man brake pedal and box wrench shuffle, to all manner of different pumps and gizmos, and we have to say that the Phoenix bleeder is the best we’ve found for doing the job easily and quickly. Bleeding brakes is one of those “mission critical” mechanical tasks, so it’s worth having the tools to do it right. Once we made sure all of our fluid was clean and free of air bubbles, we put the wheels back on and topped our brake fluid off.
For the mounting of the momentary push button, we decided to utilize the plastic panel in the center console containing the “Active Handling” button and passenger airbag light.
By drilling a small hole and securing the push button, we were able to make our line lock activation easily accessible for track use. With the control wire fed through the firewall to connect to the solenoid, we were done installing our drag strip must-have. Of course we couldn’t resist testing it out in our parking lot.
 [14]
[14]The center console panel was the perfect place for our line lock activation button, giving us easy control over our burnout capabilities.
One thing to be aware of, though – activating the line lock will seriously confuse your C5’s antilock brakes. Don’t be surprised or alarmed to see a warning on the DIC display on the dash saying that the traction control and ABS aren’t happy, but it will clear itself the next time you cycle the ignition key. You’ll want to turn off the traction control before doing a burnout anyway, so you’re not actually doing any harm to these systems. Just be aware that you are in “manual” braking mode when you’re using the system at the dragstrip
 [15]
[15]Results! Don't tell our landlord this was us, though...
 [16]
[16]Like many 2-step type controllers on the market, the LPE Launch Control system is plug and play but also features added timing retard functions.
It’s All in the Timing…
The LNC-2000 is the only product of its kind to provide a 2-step and a timing retard capability. – Jason Haines
The Line Loc Kit wasn’t the only drag strip upgrade Y2K received. We also opted to install Lingenfelter Performance Engineering’s LNC-2000 Launch Control system [17] for LS engines. This system can be used to provide a constant launch RPM on the drag strip like a traditional 2-step limiter, but it also provides numerous timing functions, which are beneficial when running a turbo/supercharger system or nitrous, that can be activated and controlled by a switch, analog 0-5v signal or progressively via a 3-bar MAP sensor input.
“The LNC-2000 is the only product of its kind to provide a 2-step and a timing retard capability,” Haines told us. “The timing retard capability can be time-based (primarily for nitrous applications) or boost based for turbocharged and supercharged engine applications. The LNC-2000 also provides an analog voltage output that can be data logged with many devices, including EFILive, so that you know how much timing retard is being taken out by the device.”
Lingenfelter sells two other launch control devices as well: the LNC-003 which is a true 2-step with two independent RPM settings for both launch and overall limits, and the LNC-TC1, which provides one RPM limit and an adjustable torque cut for vehicles with clutchless racing transmissions. Because we wanted the added timing retard capabilities and a launch control geared toward drag racing applications to go along with our future planned nitrous upgrades, we opted for the LNC-2000.
The Lingenfelter Launch Control system comes with the launch controller, 72-inch trigger wiring harness, two pieces of hook and loop tape, four self tapping screws and a transient voltage suppression (TVS) diode kit. It also comes with installation instructions and an LPE decal.
 [18]
[18]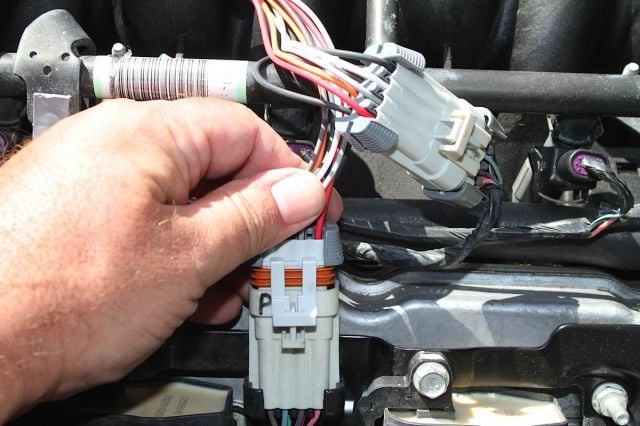 [19]
[19]
The Launch Control system's plug and play design makes for a simple install, which means more time for the track.
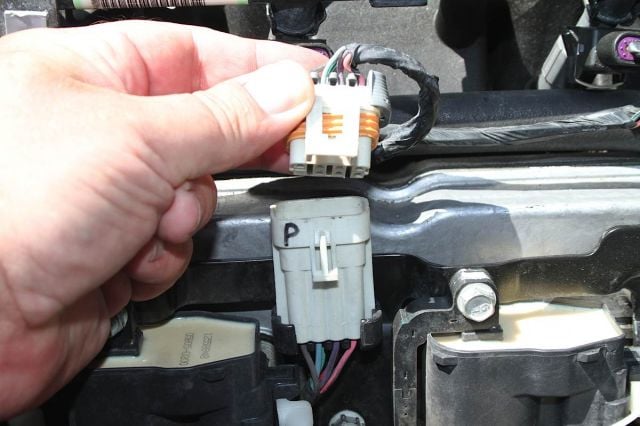
With our ignition turned off, we started our launch control install by disconnecting the coil pack connectors on each side of our engine and plugging the connectors on the LPE wiring harness into the factory adapters. The plug and play design of this system makes it simple to install with no splicing needed.
 [20]
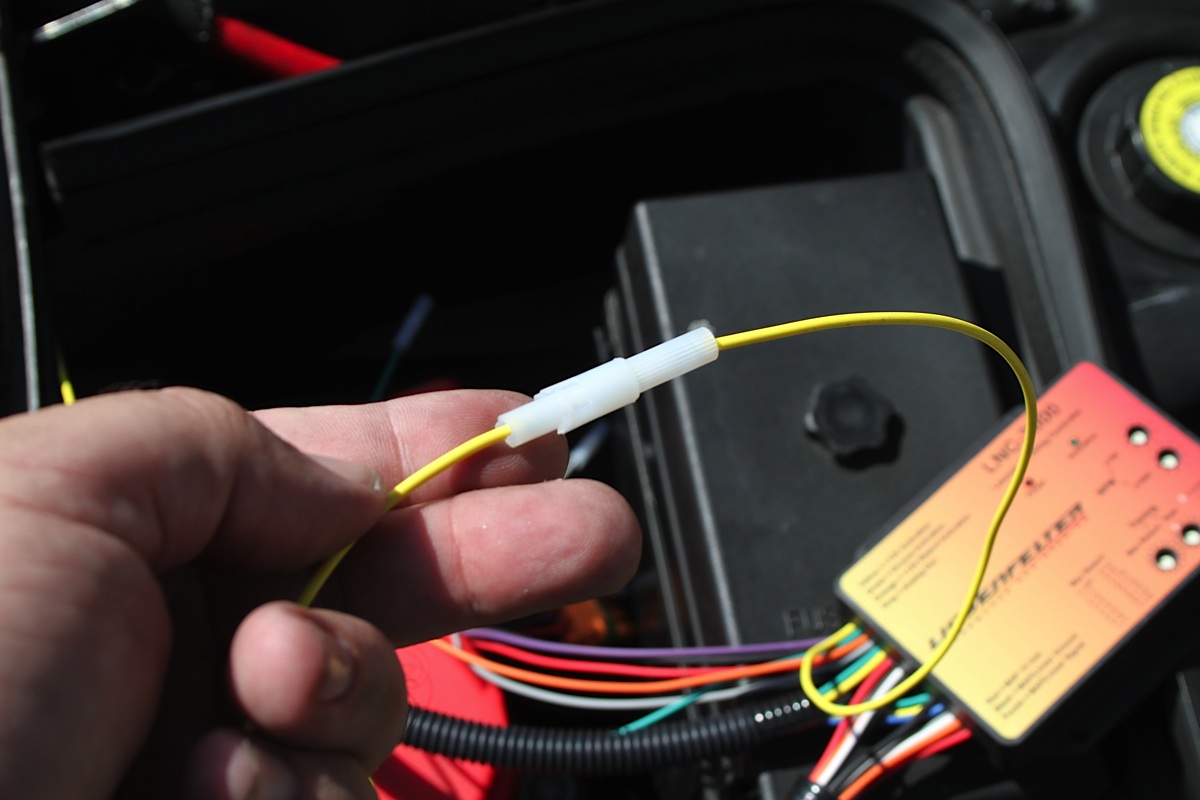
[20]The RPM limiting function can be triggered by either a connection to ground, or a 12 volt signal. We opted to use a switch under the clutch pedal that supplies power when the system is armed and the clutch is all the way in.
We then wired the LPE module to the activation and arming switches with our existing wiring we installed in the car for our previous MSD 2-step system. From the module, we ran the yellow +12V activation wire to the clutch switch we installed under the clutch pedal. This switch is connected to the arming switch placed in the switch panel in Y2K’s dash, which gets its +12V supply from the connection in the passenger side kick panel.
The final step to our install required securing the LNC-2000 module to the top of our battery using the supplied hook and loop tape. Lingenfelter warns against installing the module on top of the engine or near exhaust manifolds, as well as in proximity to other high temperature objects or within 6-inches of nitrous solenoids, so we opted for the top of the battery as the best position. LPE also included four self-tapping screws with the system for other mounting options.
 [21]
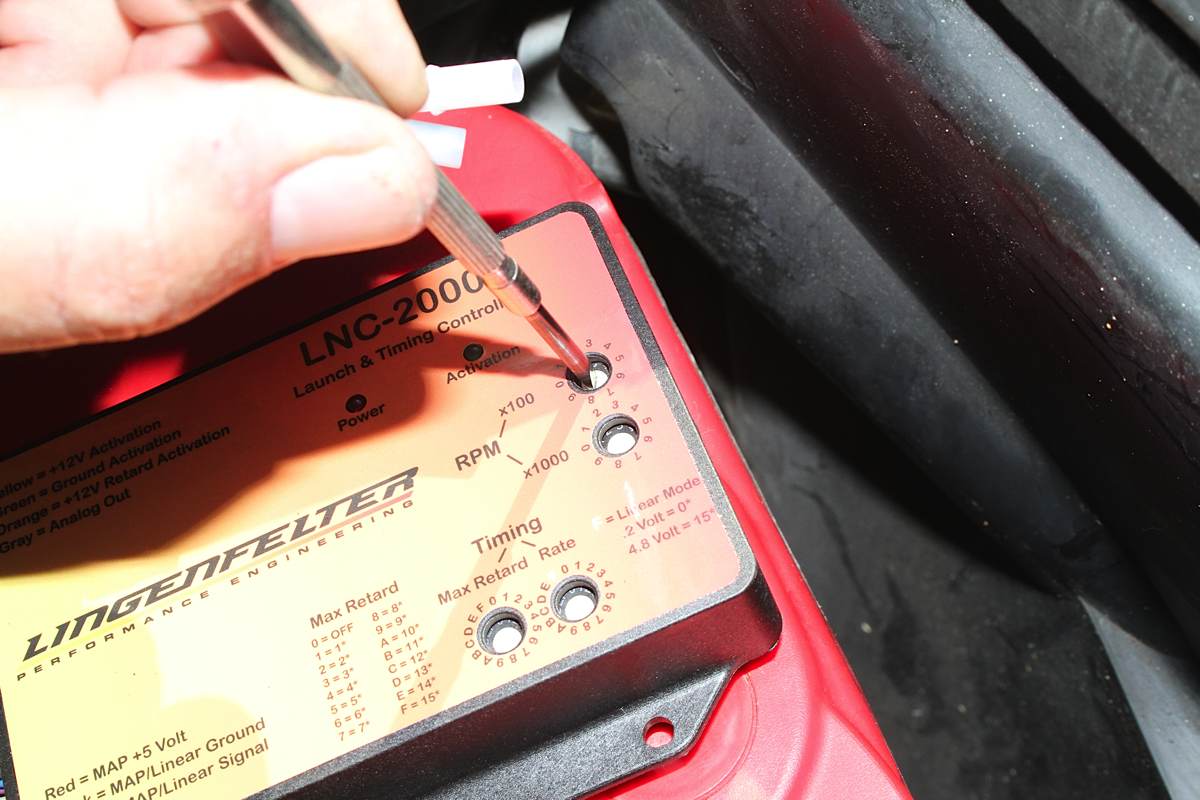
[21]Rotary dials on the top of the Lingenfelter control unit set the RPM limit.
With the extra wires we aren’t using right now tucked up against the firewall with zip ties, we were done.
Once our launch control system was installed, we had to set our desired RPM limit using the two rotary RPM dials on the top of the module. At first we set the dials using a screwdriver to reflect a 3500 RPM cut point, but once we tested this, we turned the dials down to 2800 RPM in order to get Y2K to hook at the track.
Lingenfelter warns against using the two-step function on cars with catalytic converters for two reasons. First, a non-trivial amount of raw fuel is sent unburned through the engine and down your exhaust when the RPM limit is active, which can cause the catalyst to overheat, and second, the mechanical stress of the exhaust pulses can damage the core of catalytic converters. However, occasional use on a street/strip car probably won’t cause a noticeable loss of lifespan for your cats.
 [22]
[22]The electronics are secured to the top of the battery with the provided hook-and-loop tape to keep things out of the heat and RF interference of the engine bay itself.
The LPE Launch Control module has two additional rotary dials to set timing retard degrees and retard rate, but we left them alone for now – be sure to check back frequently to see what future updates Project Y2K is in line for that will use these additional functions (hint: think “enough nitrous to do 500 horsepower to the wheels”)
Our Line Loc and LPE Launch Control systems were great additions to Y2K as we prep for an even better race season next year. Not only are these systems beneficial on the track, they’re also plug and play, which means added performance benefits from a simple install. If you’re a street/strip Corvette owner or an all out racer, these drag strip upgrades are a must for serious competition.
Postscript:
Shortly after we got the LNC-2000 installed, we took Project Y2k to Barona Dragway for a little testing with our new toys, and on our sixth pass for the day, the rear driveshaft coupler gave up. The video below captures the event – you’ll note that the line lock makes doing a healthy burnout effortless, and that the LNC-2000 doesn’t sound like any other 2-step RPM control on the market. Rather than a series of loud pops, the exhaust is more of a “grumble” when it’s on the 2-step. LPE tells us that this is because the LNC-2000 operates at a higher frequency than is typical for this kind of a device, and although we don’t have any testing to prove it, we’d guess that it is more catalyst-friendly because of the smoother distribution of cylinder-cut events. Stay tuned for more updates as we dig into the rest of Y2k’s driveline to bring it up to spec with the extra power we’re going to make on the bottle.
– Paul Huizenga